How to 3D Print Car Armrest Parts: Complete DIY Guide [2026]
Learn to 3D print car armrest parts - complete replacements, organizer inserts, hinge repairs, and more. Covers ASA materials, CAD design, print settings, and cost savings of 85-95%.
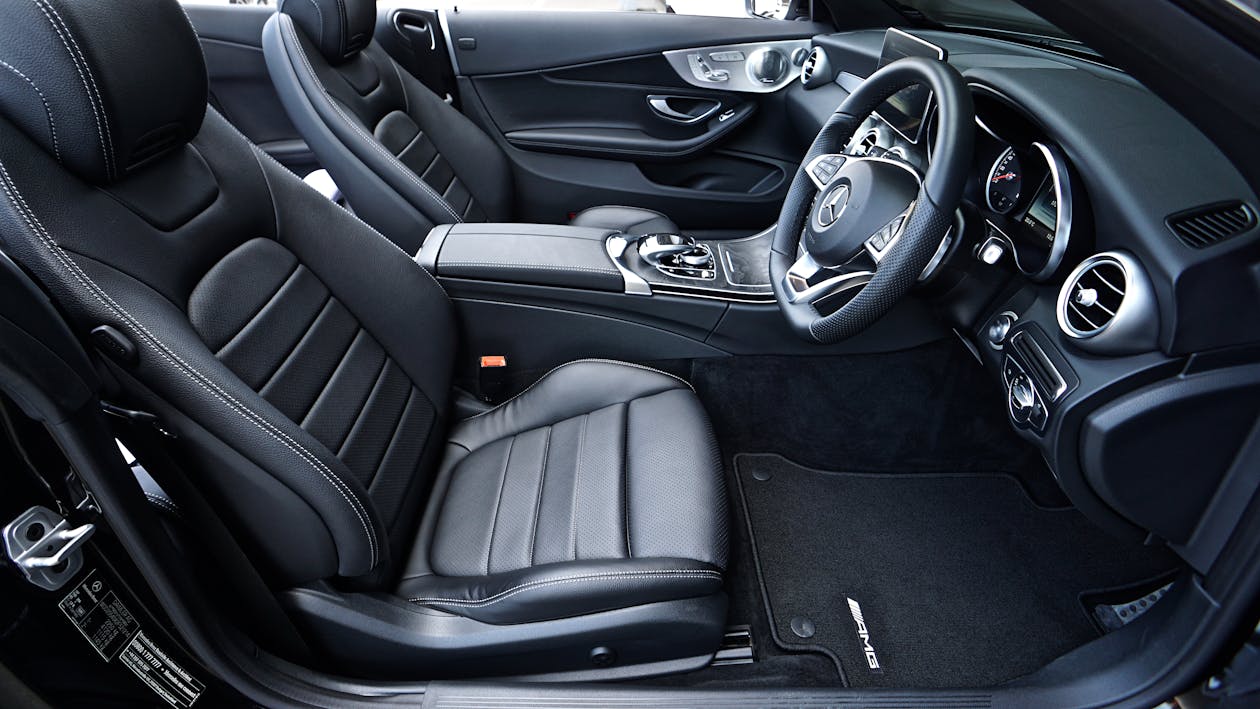
![How to 3D Print Car Armrest Parts: Complete DIY Guide [2026]](/_next/image?url=https%3A%2F%2Fimages.pexels.com%2Fphotos%2F1104768%2Fpexels-photo-1104768.jpeg%3Fauto%3Dcompress%26cs%3Dtinysrgb%26w%3D1260%26h%3D750%26dpr%3D1&w=3840&q=75)
Car armrests take constant abuse—elbows digging in during long drives, kids yanking on them, and years of UV exposure causing plastic to crack and fade. When they fail, OEM replacements can cost anywhere from $50 to $300+ depending on your vehicle. The good news? 3D printing offers a practical, affordable solution for everything from complete armrest replacements to organizer inserts and broken hinge repairs.
This guide covers the full range of 3D printed armrest projects, from quick weekend fixes to ambitious multi-part builds. Whether you're restoring a classic car's missing armrest or adding custom storage to your daily driver, you'll find the materials, techniques, and STL sources you need.
Types of 3D Printed Car Armrest Parts
Before diving into materials and printing, let's clarify what "armrest parts" actually encompasses. The category is broader than most people realize:
Complete Armrest Replacements
Full armrest assemblies are among the most ambitious 3D printing projects. The Honda CRX armrest replica by Gregparts, for example, takes over 60 hours to print and uses 1kg of filament. These are typically multi-part assemblies requiring careful design and significant post-processing, but they're often the only option for discontinued vehicles.
Armrest Lid Hinges and Latches
The most common failure point on center console armrests is the hinge mechanism. These small plastic parts break easily but are perfect for 3D printing—small, functional, and high-impact when they fail.
Armrest Organizer Inserts
These compartmentalized trays fit inside existing armrest storage compartments. They transform the typical "black hole" armrest into organized storage for coins, cards, keys, and phone charging cables. Rivian and Polestar owners have been particularly active in designing these.
Armrest Covers and Pads
Replacement covers for worn armrest padding, including the hard shell portions that protect the foam underneath. These require attention to surface finish since they're constantly visible and touched.
Door Panel Armrests

Beyond center console armrests, door panel armrests frequently crack or break—especially the internal mounting clips. The Ford Ranger door pull/armrest is a popular community design addressing this exact issue.
Seat Armrest Components
Individual seat armrests (common in vans, trucks, and older vehicles) have their own failure modes: broken pivots, worn pads, and missing hardware. Some makers even design plugs to fill the mounting holes when removing armrests entirely.
Materials for 3D Printed Armrest Parts

Material selection for armrests is critical because these parts experience constant mechanical stress, UV exposure (through windows), and temperature extremes. Here's how the common options compare:
| Material | HDT (°C) | UV Resistance | Best For | Verdict |
|---|---|---|---|---|
| PLA | 52-60°C | ❌ Poor | Prototyping only | ⚠️ Never for final parts |
| PETG | 65-75°C | ⚠️ Moderate | Interior organizers | ✅ Acceptable for shaded interiors |
| ABS | 88-105°C | ⚠️ Moderate | Hidden structural parts | ✅ Good with enclosure |
| ASA | 95-100°C | ✅ Excellent | All armrest applications | ⭐ Champion choice |
| PA-CF (Nylon) | 150-180°C | ✅ Excellent | Load-bearing hinges | ✅ Best for high-stress parts |
| TPU (95A) | 60-80°C | ✅ Good | Padding, grips, dampeners | ✅ For soft-touch surfaces |
⚠️ Critical: Never Use PLA for Car Armrest Parts
PLA will warp or completely deform in a parked car on a sunny day. Interior temperatures regularly exceed 60°C (140°F), well above PLA's heat deflection temperature. Use ASA, ABS, or PA-CF for any parts that will live in your vehicle.
Why ASA is the Champion for Armrests
ASA (Acrylonitrile Styrene Acrylate) combines everything you need for automotive interiors:
- Heat resistance: HDT of 95-100°C handles summer parking lot temperatures
- UV stability: Won't yellow or become brittle from sunlight through windows
- Impact resistance: Survives constant arm pressure without cracking
- Surface finish: Can be vapor smoothed with acetone for professional appearance
- Color stability: Maintains color over years of sun exposure
For hidden structural components like hinge mechanisms, consider PA-CF (carbon fiber reinforced nylon) for maximum strength and heat resistance.
Finding STL Files for Armrest Parts
Before designing from scratch, check if someone has already solved your exact problem:
| Source | Pricing | Armrest Coverage | Notes |
|---|---|---|---|
| Printables | Free | Growing library | Active community, quality designs |
| Cults3D | Free + Paid | 269+ designs | Audi, Renault, Ford specific parts |
| Thingiverse | Free | Legacy designs | Large archive, quality varies |
| CGTrader | Paid | 36+ models | Premium quality, commercial licenses |
| MakerWorld | Free | Bambu optimized | Pre-configured profiles for Bambu printers |
| Vehicle Forums | Free | Model-specific | Polestar, Rivian, Honda, Ford forums |
💡 Pro Tip: Check Vehicle-Specific Forums First
The Polestar Forum, Rivian Forums, and vehicle-specific subreddits often have community members who've already designed armrest organizers and replacement parts for your exact make/model. These are usually free and tested by other owners.
Designing Custom Armrest Parts

When no existing design fits your needs, you'll need to create your own. Here's the workflow:
Phase 1: Measurement and Documentation
Accurate measurements are critical for armrest parts because they need to fit existing mounting points precisely:
- Digital calipers: Measure mounting holes, clip locations, and critical dimensions
- Document existing hardware: Note screw sizes, clip types, and hinge mechanisms
- Photograph from multiple angles: Reference photos prevent design oversights
- Measure negative space: For organizer inserts, measure the cavity dimensions precisely
Phase 2: CAD Design
Your CAD software choice depends on project complexity:
| Software | Best For | Learning Curve | Cost |
|---|---|---|---|
| TinkerCAD | Simple organizers, basic shapes | Easy | Free |
| Fusion 360 | Complex assemblies, hinges | Moderate | Free (hobby) |
| OnShape | Parametric designs, collaboration | Moderate | Free (public) |
| Shapr3D | iPad workflows, quick modeling | Easy-Moderate | Free tier available |
Phase 3: Design Considerations for Armrests
Armrest parts have specific requirements that differ from typical 3D printed projects:
- Load distribution: Armrests support significant weight—design with thick walls (2-3mm minimum) and rounded stress points
- Ergonomic curves: Flat surfaces feel harsh; add subtle radii to contact surfaces
- Mounting integration: Design around existing hardware (screws, clips, hinges) rather than creating new mounting systems
- Multi-part assemblies: Large armrests often exceed print bed limits—design with interlocking joints or mechanical fasteners
- Print orientation: Align layer lines with load direction for maximum strength

Print Settings for Armrest Parts
Durability is the primary concern for armrest components. Here are optimized settings:
| Setting | ASA | ABS | PA-CF |
|---|---|---|---|
| Nozzle Temp | 240-260°C | 230-250°C | 260-280°C |
| Bed Temp | 90-110°C | 90-100°C | 70-90°C |
| Layer Height | 0.2mm | 0.2mm | 0.2mm |
| Wall Count | 4-5 | 4-5 | 3-4 |
| Infill | 25-40% gyroid | 25-40% gyroid | 20-30% gyroid |
| Enclosure | ✅ Required | ✅ Required | ✅ Required |
| Cooling | 0-30% | 0-30% | 0-20% |
🔧 Print Orientation Matters
For armrest hinges and load-bearing parts, orient the part so layer lines run parallel to the direction of stress. A hinge that flexes perpendicular to layer lines will delaminate quickly. Test fit critical parts before the full print to verify orientation.
Step-by-Step Armrest Project Workflow

Here's a complete workflow using a center console armrest organizer as an example:
Step 1: Remove and Measure
Remove the existing armrest lid or access the storage compartment. Measure:
- Interior dimensions (length, width, depth)
- Any features like hinge clearances or latch mechanisms
- Corner radii (most armrest compartments have rounded corners)
Step 2: Design in CAD
Create your organizer design with compartments sized for your specific items (phone, wallet, keys, coins). Add 0.5mm clearance on all sides for easy insertion and removal.
Step 3: Test Print
Print a small section first—just one corner with the mounting features. Verify fit before committing to a full 6-12 hour print.
Step 4: Full Print with ASA
Print the final part in ASA with the settings above. For organizer inserts, 15-20% infill is often sufficient since they don't bear significant loads.
Step 5: Post-Processing
Sand visible surfaces starting at 220 grit, working up to 400 grit. For ASA, optional acetone vapor smoothing eliminates layer lines for a factory-like finish.
Step 6: Install and Test
Install the part and test through multiple open/close cycles. Leave the car in direct sun for a day to verify heat resistance before considering the project complete.
Cost Comparison: OEM vs 3D Printed Armrest Parts

The economics of 3D printing armrest parts are compelling:
| Part Type | OEM Price | 3D Print Cost | Savings |
|---|---|---|---|
| Armrest hinge (small) | $25-50 | $1-2 | ~95% |
| Console lid latch | $30-75 | $2-4 | ~94% |
| Armrest cover/pad | $50-150 | $5-15 | ~90% |
| Door armrest assembly | $75-200 | $10-25 | ~88% |
| Complete center armrest | $150-350 | $20-50 | ~85% |
| Organizer insert | $20-60 | $3-8 | ~87% |
For discontinued vehicles, the savings are even more dramatic—OEM parts simply don't exist, and NOS (new old stock) prices can be astronomical. The Honda CRX armrest replica mentioned earlier is a perfect example: factory replacements haven't been available for decades, but the 3D printed version costs under $50 in materials.
Printer Requirements
Not all 3D printers can handle armrest projects effectively. Here are the requirements:
| Feature | Minimum | Recommended | Why It Matters |
|---|---|---|---|
| Enclosure | DIY possible | Built-in | Required for ASA/ABS (prevents warping) |
| Heated Bed | 100°C | 110°C+ | ASA adhesion requires high temps |
| Build Volume | 220×220×250mm | 300×300×300mm+ | Larger armrest parts need bigger beds |
| All-Metal Hotend | Required | Required | PTFE-lined hotends can't handle 250°C+ |
| Hardened Nozzle | Not required | Recommended | Needed for carbon fiber reinforced materials |
Recommended printers: Bambu Lab P1S, Creality K1C, Qidi X-Max 3, or any enclosed printer with the specifications above.

Case Study: Honda CRX Complete Armrest

The Gregparts CRX armrest replica demonstrates what's possible with ambitious armrest projects:
Honda CRX Armrest Replica
- Print time: 60+ hours
- Filament used: 1kg (multiple parts)
- Complexity: Multi-part assembly with integrated cup holder
- Material: Engineering-grade thermoplastic
- OEM alternative: None (discontinued decades ago)
- Retail price: ~$180-250 assembled
- DIY cost: ~$30-40 in materials
This project represents the upper end of armrest complexity—most armrest parts are far simpler. But it demonstrates that even large, complete assemblies are achievable with patience and proper technique.
Troubleshooting Common Issues
| Problem | Cause | Solution |
|---|---|---|
| Part warps/deforms in car | Material HDT too low | Switch to ASA or PA-CF |
| Part doesn't fit mounting holes | Measurement error or shrinkage | Add 0.2-0.3mm to hole diameters |
| Hinge breaks under load | Wrong print orientation | Orient layers parallel to stress direction |
| Surface looks rough | Layer lines visible | Sand progressively + acetone vapor (ASA) |
| Print warps during printing | Insufficient enclosure temperature | Preheat enclosure 15+ minutes before print |
| Parts feel flimsy | Insufficient wall count/infill | Use 4+ walls and 25%+ infill |
What NOT to 3D Print
While armrest parts are generally safe to 3D print, some related components should be left to OEM or certified manufacturers:
⛔ Never 3D Print These Parts
- Seat mounting brackets: Safety-critical structural components
- Seatbelt anchors: Must meet federal crash standards
- Airbag-adjacent components: Could interfere with airbag deployment
- Child seat anchors: Life-safety components with certification requirements
Focus on interior comfort and organization parts—leave safety-critical structural components to certified manufacturers.
🚗 Ready to Start Your Armrest Project?
Join our community of automotive 3D printing enthusiasts. Share your designs, get feedback on CAD work, and find tested STL files for your specific vehicle.
Join the Community →Frequently Asked Questions

ASA is the champion choice for most armrest applications. It offers excellent heat resistance (95-100°C HDT), UV stability, and impact resistance. For high-stress components like hinges, PA-CF (carbon fiber nylon) provides superior strength. Never use PLA—it will deform in a parked car on a warm day.
It varies dramatically by part type. A simple organizer insert might take 4-8 hours. Armrest lid hinges typically print in 1-3 hours. Complete armrest assemblies like the Honda CRX replica can take 60+ hours across multiple parts.
PETG is acceptable for armrest organizer inserts in shaded interior compartments, where they're protected from direct sunlight. However, ASA is still preferred because it handles occasional sun exposure better and won't warp if you leave the armrest open on a sunny day.
Check Printables, Cults3D, and Thingiverse first. Then search vehicle-specific forums (Polestar Forum, Rivian Forums, Reddit communities for your make). The 3DPCP parts library also has a growing collection of tested armrest designs.
Yes, for ASA and ABS you need an enclosed printer to prevent warping. These materials are sensitive to drafts and temperature changes during printing. Enclosed printers like the Bambu Lab P1S, Creality K1C, or Qidi X-Max 3 handle these materials reliably.
Start by printing with ASA in black or a color matching your interior. Sand progressively (220 → 320 → 400 grit). For the best results, use acetone vapor smoothing on ASA parts—this melts the layer lines together for a smooth, injection-molded appearance. Some makers also apply a textured spray paint for an OEM grain finish.
📥 Start Your Armrest Project Today
Browse our library of tested armrest designs, share your own creations, and connect with fellow automotive 3D printing enthusiasts.
Conclusion
3D printed car armrest parts represent a practical, cost-effective solution for everything from simple organizer inserts to complete armrest assemblies. The key is choosing the right material (ASA for most applications, PA-CF for high-stress components) and using proper print settings for automotive durability.
Whether you're restoring a classic car's missing armrest, adding organization to your daily driver, or fixing a broken console lid hinge, 3D printing offers savings of 85-95% compared to OEM parts—and for discontinued vehicles, it may be your only option.
Start simple with an organizer insert or small repair part, build your skills, and work up to more ambitious projects. The armrest you fix today might be the classic car restoration that saves someone else's project tomorrow.

