3D Printed Car Interior Parts: Complete Guide to DIY Dashboard, Console & Trim Restoration
Learn how to create custom 3D printed car interior parts including dashboard components, console accessories, air vents, and trim pieces. Discover the best materials, print settings, and techniques for professional results.

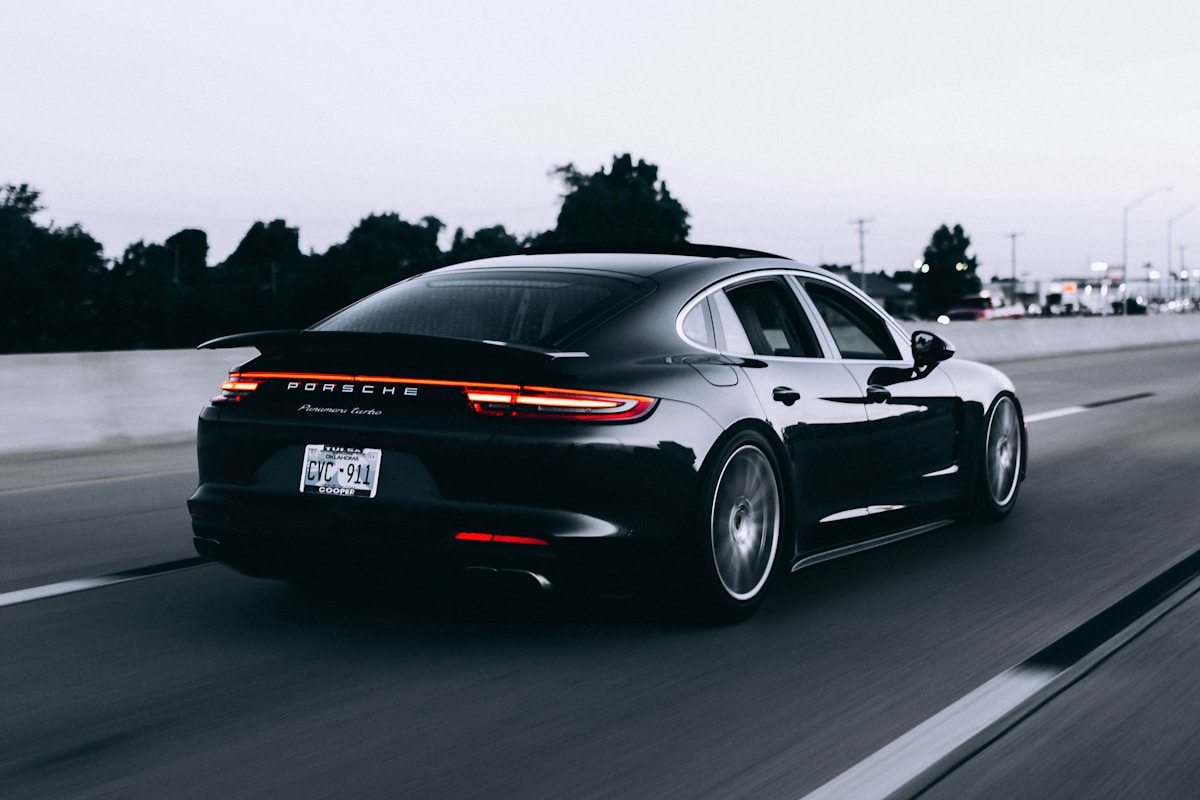
If you've ever felt the frustration of a cracked dashboard bezel, a broken cup holder, or a missing air vent clip that rattles with every bump in the road, you're not alone. Car interiors take a beating over the years, and finding replacement parts—especially for older or discontinued vehicles—can feel like searching for a needle in a haystack. But here's the exciting news: 3D printing technology has revolutionized how we approach automotive interior repairs and customization, putting the power to create perfect-fit replacement parts right in your hands.
Whether you're a classic car enthusiast trying to restore a vintage interior, a daily driver dealing with wear and tear, or a DIY modifier looking to add custom touches to your ride, 3D printed car interior parts offer an incredible solution. In this comprehensive guide, we'll explore everything you need to know about creating, sourcing, and installing 3D printed interior components for your vehicle.
Why 3D Printed Car Interior Parts Are Changing the Game
The automotive aftermarket has been transformed by additive manufacturing. What once required expensive molds, long lead times, and minimum order quantities can now be produced on demand, one piece at a time, exactly when you need it. Let's examine why 3D printing has become such a powerful tool for car interior work.
The End of Discontinued Parts
One of the most significant benefits of 3D printing is solving the discontinued parts problem. Automakers typically stop producing interior trim pieces within 10-15 years after a model ends production. For classic car owners, this has meant relying on expensive NOS (new old stock) parts, questionable used pieces, or going without entirely.
With 3D printing, the part only needs to exist as a digital file to be reproduced indefinitely. Our community parts library hosts hundreds of interior components that members have designed and shared, ensuring these parts remain available for generations to come.
💡 Did You Know?
The Cadillac Celestiq, priced at over $300,000, features 115 different 3D printed parts in its interior alone, including the steering wheel, window switches, and door handles. If luxury automakers trust 3D printing for their flagship vehicles, it's certainly reliable enough for your daily driver!
Cost Savings That Add Up
Dealer replacement parts for interior components can be shockingly expensive. A simple trim piece that costs $2 worth of filament to print might cost $80-150 from a dealer—if it's even available. Custom or low-volume parts are even worse, sometimes quoted at several hundred dollars for what amounts to a small plastic clip.
Let's look at some real-world cost comparisons for common interior parts. These numbers demonstrate why 3D printing has become so popular among car enthusiasts and repair shops alike:
| Part Type | OEM Dealer Price | 3D Print Cost | Savings |
|---|---|---|---|
| Air Vent Assembly | $85-200 | $3-8 | 95%+ |
| Cup Holder Insert | $40-80 | $1-3 | 96%+ |
| Dashboard Bezel | $60-150 | $4-12 | 92%+ |
| Door Handle Bezel | $35-75 | $2-5 | 93%+ |
| Trim Clips (pack of 20) | $15-40 | $0.50-2 | 95%+ |
| HVAC Control Knob | $25-60 | $0.50-2 | 96%+ |
These savings multiply quickly when you're working on a full interior restoration or maintaining an older vehicle where multiple components need attention. A complete interior refresh that might cost thousands in OEM parts could potentially be accomplished for under $100 in filament costs.
Customization Without Compromise
Beyond mere replacement, 3D printing enables modifications that simply weren't possible for the average car owner before. Want a phone mount that integrates perfectly with your dashboard design? A custom gauge pod that fits your specific instrumentation? Storage solutions tailored to exactly what you carry? With 3D printing, these aren't expensive custom fabrication jobs anymore—they're weekend projects.
The customization possibilities extend to aesthetics as well. Interior parts can be printed in virtually any color, with custom textures, or even with embedded designs and logos. Some makers have created entire themed interiors, from carbon fiber-look racing setups to retro-styled dashboards that transform modern vehicles into nostalgic throwbacks.
Common Car Interior Parts Perfect for 3D Printing

Not every interior component is suitable for 3D printing, but a surprisingly large number are. Here's a breakdown of the most commonly printed interior parts and their difficulty levels:
| Part Category | Examples | Difficulty | Recommended Material |
|---|---|---|---|
| Dashboard Components | Air vents, bezels, gauge surrounds, switch panels | Intermediate | ASA, ABS, PETG |
| Console Parts | Cup holders, phone mounts, storage dividers, shifter trim | Beginner | PETG, ABS |
| Door Panels | Handle bezels, armrest trim, speaker grilles, pull handles | Intermediate | ASA, ABS |
| Clips & Fasteners | Panel clips, trim retainers, wire guides, button clips | Beginner | Nylon, PETG |
| HVAC Components | Vent blades, air distribution valves, duct adapters | Advanced | ASA, Heat-resistant PETG |
| Custom Accessories | Phone holders, key organizers, sunglasses clips | Beginner | PLA+, PETG |
⚠️ Important Safety Note
Never 3D print parts that are critical to vehicle safety, such as airbag covers, seatbelt components, structural elements, or anything that could impede airbag deployment. These components are engineered with specific materials and manufacturing processes that cannot be replicated with consumer 3D printing. Stick to non-safety-critical trim and accessories.
Choosing the Right Material for Interior Parts
The car interior presents unique challenges for 3D printed parts. Temperature extremes, UV exposure, and mechanical stress all play a role in determining which material will perform best. Here's what you need to know about selecting the right filament for your interior project.
The Heat Problem
Car interiors get hot—really hot. On a sunny summer day, your dashboard can reach temperatures exceeding 70°C (158°F), and some surfaces exposed to direct sunlight through the windshield can approach 90°C (194°F). This makes material selection critical.
Standard PLA filament, while easy to print, has a glass transition temperature of only about 60°C. Parts printed in PLA will warp, sag, or completely deform when left in a hot car. This is why heat-resistant materials are essential for any part that will be exposed to direct sunlight or heat from the HVAC system.
| Material | Heat Resistance | UV Resistance | Print Difficulty | Best Use Cases |
|---|---|---|---|---|
| ASA | Excellent (95-100°C) | Excellent | Moderate | Dashboard parts, any sun-exposed area |
| ABS | Very Good (85-100°C) | Poor | Moderate | Hidden parts, center console components |
| PETG | Good (70-80°C) | Good | Easy | Console storage, clips, brackets |
| PC (Polycarbonate) | Excellent (110-130°C) | Good | Difficult | High-stress areas, vent mechanisms |
| Nylon (PA) | Excellent (80-180°C) | Varies | Difficult | Clips, hinges, mechanical parts |
| PLA+ | Poor (55-65°C) | Poor | Very Easy | Trunk organizers, non-exposed accessories |
✅ Pro Tip: ASA is the Gold Standard
For most interior applications, ASA (Acrylonitrile Styrene Acrylate) is your best choice. It offers excellent heat resistance, outstanding UV stability, and prints similarly to ABS but without as much warping. It's what many OEM manufacturers use for actual automotive parts. The slightly higher cost is well worth the peace of mind.
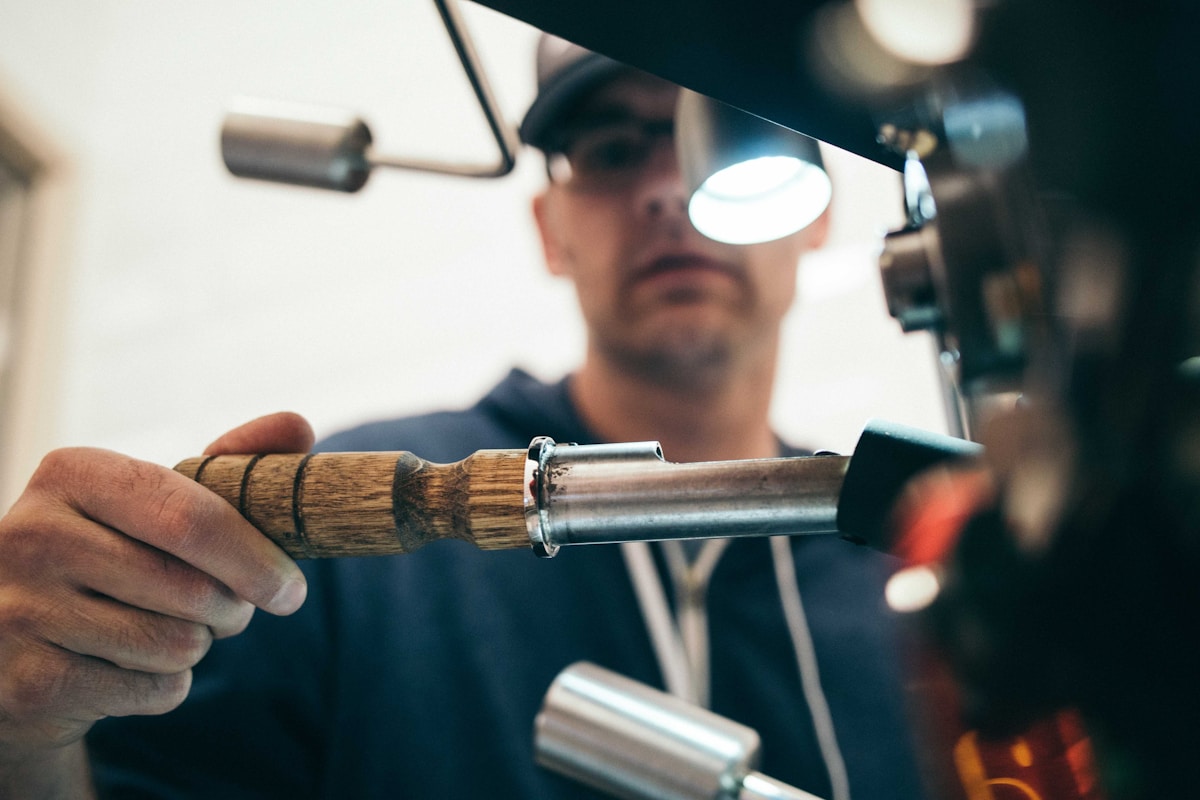
Getting Started: Equipment and Setup
You don't need an expensive industrial printer to create quality interior parts. Here's what you need to get started with automotive 3D printing:
Minimum Printer Requirements
For printing car interior parts, your 3D printer should have:
- Heated bed capable of 100-110°C — Essential for printing ABS, ASA, and other engineering materials
- Enclosed chamber (or DIY enclosure) — Prevents warping and improves print quality for temperature-sensitive materials
- All-metal hot end — Required to reach the higher temperatures (250-280°C) needed for engineering plastics
- Build volume of at least 200x200x200mm — Many interior parts are larger than typical desktop print beds
- Good bed adhesion system — PEI sheets work well for most automotive materials
Popular printers in the automotive maker community include the Prusa MK4, Bambu Lab X1C, Creality K1 Max, and Voron builds. Each has its strengths, but any printer meeting the requirements above will serve you well.
Essential Printing Settings
Automotive parts demand specific print settings for durability:
- Layer height: 0.2mm — Good balance of speed and quality; 0.16mm for visible surfaces
- Infill: 40-60% — Higher than typical to withstand mechanical stress
- Perimeter walls: 4-5 — Creates a stronger outer shell for snap-fit features
- Print speed: Moderate — Slower speeds (40-60mm/s) reduce the chance of warping and layer adhesion issues
- Cooling: Reduced or off — For ABS/ASA, minimal cooling prevents layer separation
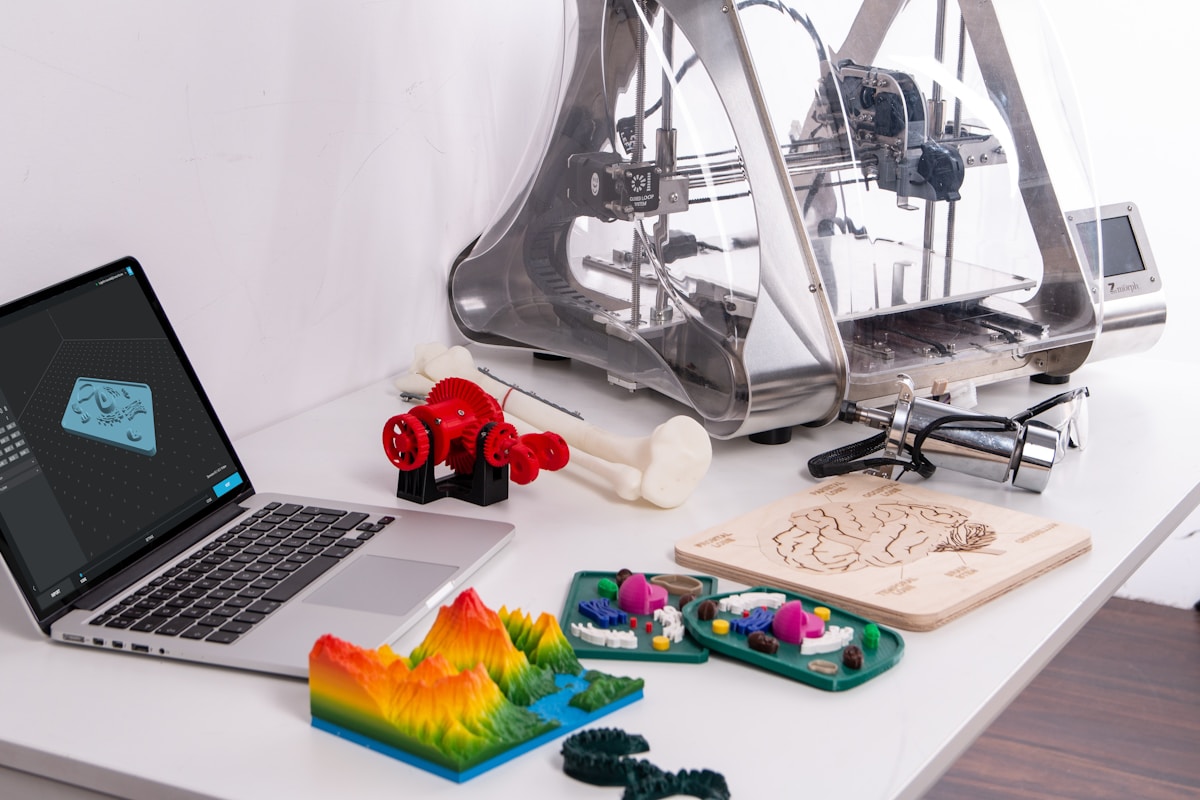
Step-by-Step: Creating Custom Interior Parts

Ready to create your own interior part? Here's the complete workflow from broken part to installed replacement:
Step 1: Document and Measure the Original
If you have the original part (even if broken), start by thoroughly documenting it:
- Take photos from all angles, including closeups of mounting features
- Measure all critical dimensions using digital calipers (accuracy to 0.01mm is important)
- Note the mounting method: clips, screws, press-fit, etc.
- Document any flexible features or undercuts that affect how the part installs
- If the part is broken, carefully reassemble it with tape to get accurate measurements
Step 2: Design in CAD Software
You have several options for CAD design:
- Fusion 360 — Industry standard, free for hobbyists, excellent for parametric design
- Tinkercad — Browser-based, great for beginners, limited for complex parts
- FreeCAD — Open source, powerful but steeper learning curve
- Blender — Better for organic shapes, mesh-based modeling
When modeling, add 0.2-0.3mm of tolerance to mating surfaces to account for print variations. For snap-fit features, test your tolerances with small test prints before committing to a full part.

Alternative: 3D Scanning for Reverse Engineering
If you don't have CAD skills or the original part is too complex to measure manually, 3D scanning offers another path. Modern photogrammetry apps like Polycam or Meshroom can create 3D models from smartphone photos. For higher precision, affordable structured light scanners like the Revopoint or Creality Scan provide sub-millimeter accuracy.
The scanning workflow typically looks like this:
- Clean the part and apply scanning spray if it's shiny or transparent
- Scan from multiple angles, ensuring complete coverage
- Process the scan into a mesh file
- Clean up the mesh, filling holes and smoothing artifacts
- Convert to a solid model if needed for modification
- Export as STL for printing
Scanning works best for organic shapes and parts where exact mechanical dimensions aren't critical. For parts with precise mounting holes or snap-fit features, you may still need to model those elements manually and merge them with your scanned geometry.
🎯 Skip the Design Work
Not comfortable with CAD? Browse our parts library where community members have already designed and shared thousands of interior parts. You might find exactly what you need, ready to download and print!
Step 3: Slice and Print
Use a slicer like PrusaSlicer, Cura, or Bambu Studio to prepare your model:
- Orient the part for optimal strength—think about which direction forces will act on it
- Add supports only where necessary; minimize supports on visible surfaces
- Preview the sliced model to catch issues before printing
- Print a test piece first if the part is large or complex
Step 4: Post-Processing for OEM Look
Raw 3D prints rarely look factory-finished. Here's how to achieve that professional appearance:
- Sanding: Start at 200 grit, work up to 800+ for smooth surfaces
- Filler primer: Spray filler primer to hide layer lines before painting
- Paint matching: Use interior paint codes from your vehicle's door jamb sticker
- Texture coating: Products like SEM Texture Coating recreate that soft-touch dashboard feel
- Vapor smoothing: For ABS parts, acetone vapor can create a glossy, smooth finish
Real-World Examples: Interior Parts Our Community Has Made
The automotive 3D printing community has created incredible interior parts. Here are some inspiring examples shared by makers on our community forum:
Dashboard Air Vent Restoration
A BMW E30 owner faced a common problem: the brittle plastic air vents in his 1988 325i had cracked and broken over 35 years of UV exposure. OEM replacements were discontinued, and used ones were equally degraded. His solution? Designing a complete replacement vent assembly in Fusion 360, printed in black ASA. The new vents function better than original and will outlast the originals thanks to ASA's superior UV resistance.
Custom Cup Holder Insert
The huge cup holders in a 2015 Ram 1500 were designed for Big Gulp-sized drinks, making standard water bottles wobble and tip. A community member designed a modular cup holder insert system that accommodates everything from slim cans to large Yeti tumblers. Printed in PETG, it's been in daily use for three years with no issues.
Mazda MX-5 Switch Panel
Miata enthusiasts know the struggle of integrating aftermarket switches without butchering the dash. One maker created a custom switch panel that replaces the ashtray (who smokes anymore?) with a clean array of toggle switches for auxiliary lights, fuel pump, and fan override. The design even includes integrated LED bezels.
Porsche 944 Gauge Cluster Restoration
A Porsche 944 owner discovered that the plastic surrounds in his gauge cluster had cracked and faded beyond repair. Original parts were unavailable, and aftermarket options didn't match the factory look. After measuring the originals and modeling replacements in Fusion 360, he printed them in satin black ASA. The result? Better than new, with the added benefit of UV-stabilized material that won't degrade like the original ABS did.
Toyota Tacoma Custom Center Console Organizer
Factory center consoles are often designed as one-size-fits-none solutions. A Tacoma owner designed a modular organizer system that divides the deep center console into compartments sized for his exact use case: a slot for his multitool, dividers for change and cards, and a charging cable management system. The design has since been downloaded over 2,000 times by other Tacoma owners.
Jeep Wrangler JK Custom Dash Storage
Wrangler owners are notorious for wanting to customize every inch of their vehicles. One community member created a dash-mounted storage tray that clips into the factory grab handle location, providing accessible storage for phones, wallets, and trail maps. Printed in high-temperature ASA to survive desert sun, it's become one of the most popular Jeep-specific downloads in our library.
Popular Interior Parts in Our Library
- ✓ Honda Civic (1992-2000) — Complete console button set, HVAC knobs, shifter trim
- ✓ BMW E36/E46 — Cup holders, coin trays, OBD2 port covers
- ✓ Ford Mustang (2005-2014) — Dashboard bezels, vent surrounds, console storage
- ✓ Toyota/Lexus — Universal clip assortments, phone mounts, sunglasses holders
- ✓ Universal — Cable management, phone charging cradles, key organizers
Advanced Techniques for Professional Results

Once you've mastered the basics, these advanced techniques will help you achieve truly professional results:
Multi-Material Printing
Some interior parts benefit from using multiple materials. A console button, for example, might use rigid PETG for the body with a TPU overmold for the soft-touch pressing surface. Printers with automatic material changing systems (AMS) make this practical for home use.
Insert Molding
For parts that need metal threads or electronic components, design your part with cavities for brass heat-set inserts. These provide strong, reusable threads that won't strip like plastic ones. Insert sizes are standardized, so design files can include the proper cavity dimensions.
Embedded Components
Advanced makers pause their prints mid-layer to embed LEDs, magnets, or other components directly into the part. This technique works great for custom ambient lighting bezels or magnetic phone mounts.
| Technique | Difficulty | Equipment Needed | Best Applications |
|---|---|---|---|
| Heat-Set Inserts | Easy | Soldering iron, insert tips | Any screw-mount part |
| Acetone Vapor Smoothing | Moderate | Sealable container, acetone | ABS visible parts |
| Multi-Material | Moderate | AMS/MMU system | Buttons, grips, seals |
| Embedded Components | Advanced | Print pause capability | LED bezels, magnetic mounts |
| Carbon Fiber Reinforced | Moderate | Hardened nozzle | High-strength structural parts |
Troubleshooting Common Issues
Even experienced makers run into problems. Here's how to solve the most common issues with automotive interior parts:
Part Warped After Printing
Large flat parts are notorious for warping, especially in ABS and ASA. Solutions include:
- Increase bed temperature by 5-10°C
- Add a brim (5-10mm) to increase bed adhesion
- Ensure your enclosure maintains consistent temperature
- Try printing on a draft shield to reduce air currents
- Consider splitting large parts and assembling post-print
Snap Fits Too Tight or Too Loose
Snap-fit tolerances are tricky. If your clips don't fit:
- Print tolerance test pieces first (available in our resources section)
- Adjust your CAD model in 0.1mm increments
- Account for printer-specific dimensional accuracy
- Consider temperature during use—parts may expand or contract
Part Deformed in Hot Car
If your part warped after sitting in a hot vehicle:
- Switch to a higher heat-resistance material (ASA or PC)
- Consider annealing PLA parts to increase heat resistance
- Move the part to a location with less direct sun exposure
- Use a sun shade to reduce interior temperatures
🚨 Material Failure Warning Signs
Replace any 3D printed interior part immediately if you notice: yellowing/discoloration (UV degradation), surface cracking or crazing, permanent deformation, brittleness when flexed, or strong chemical smell. These indicate material breakdown that could lead to sudden failure.
The Future of 3D Printed Car Interiors

The automotive industry is increasingly embracing 3D printing for production vehicles, not just prototypes. According to 3D Natives, major manufacturers like Porsche, BMW, Bentley, and Cadillac now offer 3D printed interior components in their production vehicles.
Ford has even released the Ford Integrated Tether System (FITS) for their Maverick pickup, providing official CAD files for owners to print their own accessories. This represents a major shift in how automakers view owner modification and customization.
OEM Manufacturers Embracing 3D Printing
Major automakers have moved beyond prototyping and now use 3D printing for production interior components:
- Porsche — Offers 3D printed custom-fit seat cushions through their Performance Parts program, with three firmness levels personalized to each buyer
- BMW — Has added 3D printed center consoles to production vehicles and recycled waste 3D printing powder into new filament
- Bentley — The Batur features 18-karat gold 3D printed ventilation controls and titanium exhaust finishers
- Lamborghini — The Sián was the first to feature customizable 3D printed interior vents, going from concept to installed part in just two weeks
- Renault — Offers customizable 3D printed storage accessories for the Renault 5 E-Tech in various patterns and colors
- Maserati — Used Stratasys J850 printing for custom headrest designs in the GranTurismo One Off Luce
This industry adoption validates what the DIY community has known for years: 3D printing produces parts that meet or exceed the quality standards of traditional manufacturing methods.
What's Coming Next
- Personalized interiors: Order your next vehicle with custom 3D printed trim in your choice of colors and textures
- On-demand replacement parts: Dealers may print parts on-site rather than warehousing inventory
- Official maker programs: More manufacturers releasing CAD files and encouraging customization
- New materials: Better automotive-grade filaments with easier printing and superior performance
- Integrated electronics: Parts with embedded sensors, lighting, and connectivity printed as single units
- Sustainable materials: Bio-based and recycled filaments that meet automotive standards
Recommended Printers for Automotive Interior Parts

While many printers can handle automotive parts, some are particularly well-suited for the materials and part sizes commonly needed. Here are our community's top recommendations across different budget ranges:
| Budget Range | Recommended Printer | Build Volume | Best For |
|---|---|---|---|
| Entry ($200-400) | Creality Ender 3 S1 Pro | 220×220×270mm | Small to medium parts, learning |
| Mid-Range ($400-800) | Bambu Lab P1S | 256×256×256mm | Enclosed, fast, multi-material capable |
| Prosumer ($800-1500) | Prusa MK4 | 250×210×220mm | Reliability, support, quality |
| Large Format ($1000-2000) | Creality K1 Max | 300×300×300mm | Large dashboards, door panels |
| Enthusiast ($1500+) | Bambu Lab X1C + AMS | 256×256×256mm | Multi-color, automation, reliability |
For most automotive work, an enclosed printer with a heated bed capable of 100°C+ is essential. If you're serious about making interior parts regularly, the investment in a quality enclosed printer will pay for itself quickly in reduced failed prints and better part quality.
Ready to Start Your Interior Project?
Join thousands of automotive makers who are already creating custom interior parts. Browse our parts library, share your designs, and connect with the community.
Frequently Asked Questions
What's the best filament for dashboard parts?
ASA is the best overall choice for dashboard parts due to its excellent heat resistance (up to 100°C) and outstanding UV stability. ABS is a close second but will degrade faster in direct sunlight. Avoid PLA for any part exposed to sun or heat.
How long do 3D printed interior parts last?
With the right material, 3D printed interior parts can last for years—sometimes outlasting the originals. ASA and ABS parts in protected areas (not direct sun) have been reported working fine after 5+ years. Material choice and print quality are the biggest factors in longevity.
Can I print parts for vintage cars?
Absolutely! 3D printing is particularly valuable for vintage and classic cars where parts are no longer manufactured. Many makers have successfully recreated interior parts for vehicles 30-50+ years old. Check our parts library or ask in the forum if someone has already designed what you need.
Do I need a special printer for automotive parts?
Any FDM printer that can handle ABS/ASA will work. Key requirements are: heated bed (100°C+), all-metal hot end, and preferably an enclosure. Popular choices include the Prusa MK4, Bambu Lab printers, and Voron builds. Budget options like the Creality K1 also work well.
Is it safe to print interior parts?
For non-safety-critical trim and accessories, yes. Never print parts that could affect airbag deployment, seatbelt function, or structural integrity. Stick to decorative trim, storage solutions, mounts, and clips. When in doubt, don't print it—consult with a professional.
How do I match the color of my existing interior?
Start by identifying your interior color code (usually on the door jamb sticker). Many filament manufacturers offer automotive-specific colors. For exact matches, print in neutral gray or black, then paint with interior-grade paint using the color code. SEM Color Coat is popular for this purpose and provides factory-matching colors for many vehicles.
Can I sell 3D printed interior parts?
Yes, many makers sell their designs or printed parts. However, be aware of intellectual property considerations—you cannot sell exact replicas of OEM parts without permission. Original designs and improvements are generally safe. Some sellers focus on parts for vehicles where the original manufacturer has stopped production, filling a genuine market need.
What about parts that need to flex or have living hinges?
Flexible parts require flexible filaments like TPU or TPE. These materials are more challenging to print but allow for parts like gaskets, seals, button pads, and living hinges. For living hinges specifically, orient your print so layers run parallel to the hinge line, and use thin wall thicknesses at the hinge point (0.4-0.8mm works well).
How do I waterproof 3D printed parts for use near windows or doors?
FDM prints are not naturally waterproof due to layer lines. For water resistance, use a coating like XTC-3D epoxy resin, or print with PETG at higher temperatures for better layer adhesion. Alternatively, design parts with drainage channels so any water that enters can escape rather than pooling and causing damage.
Conclusion: Transform Your Interior with 3D Printing

3D printed car interior parts represent one of the most practical and rewarding applications of additive manufacturing technology. Whether you're restoring a classic, maintaining an aging daily driver, or customizing a new vehicle, the ability to create perfect-fit parts on demand is genuinely transformative.
The technology has matured to the point where amateur makers can produce parts that rival or exceed OEM quality. With the right materials, proper print settings, and some post-processing, your 3D printed interior components will look and function exactly as intended—often at a fraction of the cost of dealer replacements.
The barriers to entry have never been lower. Quality printers capable of printing automotive-grade materials are now available for under $500. Filaments specifically designed for high-heat and UV-exposure applications are widely available at reasonable prices. Free CAD software provides professional-grade design capabilities. And thriving online communities like ours provide support, shared designs, and troubleshooting help whenever you need it.
Perhaps most importantly, the skills you develop printing car interior parts transfer to countless other applications. The same techniques used to create a custom cup holder can be applied to home repairs, tool organization, hobby projects, and professional prototyping. Your investment in learning 3D printing pays dividends far beyond automotive work.
As more automakers embrace additive manufacturing and release official CAD files for owner printing, we're entering a golden age of vehicle customization. The days of hunting through junkyards or paying premium prices for discontinued parts are coming to an end. The future belongs to makers who can design, iterate, and produce exactly what they need—and that future is available to you right now.
Join the Community
Have a design to share or need help with your project? Our community of automotive 3D printing enthusiasts is here to help.
Ready to get started? Browse our parts library, check out Cults3D for more designs, and don't forget to share your creations with the community. Every part you design and share helps another maker keep their vehicle on the road.
Happy printing! 🚗🔧

