3D Printed Car Parts Safety: Complete Guide to Safe Automotive 3D Printing
Comprehensive safety guide for 3D printing automotive parts. Learn which parts are safe to print, material selection, testing methods, and design guidelines for safe DIY car parts.

When you're creating custom parts for your vehicle using 3D printing technology, safety isn't just an afterthought—it's the foundation of everything you build. Whether you're replacing a broken interior clip or designing a custom bracket for your classic car restoration, understanding the safety implications of additive manufacturing in automotive applications is absolutely critical. A part that looks perfect on your printer bed could become a dangerous failure point on the road if you haven't considered material properties, structural integrity, and real-world operating conditions.
This comprehensive guide explores everything you need to know about 3D printed car parts safety—from understanding which parts are safe to print and which should never be attempted, to selecting the right materials, testing your creations, and navigating the legal landscape. Whether you're a seasoned maker or just getting started with automotive 3D printing, this guide will help you create parts that are not only functional but genuinely safe for road use. Ready to learn more? Browse our community library of tested, verified printable car parts designed with safety in mind.
Understanding the Safety Landscape: What Makes 3D Printed Car Parts Different
Before diving into specific safety guidelines, it's essential to understand why 3D printed parts require special consideration compared to traditionally manufactured components. When you purchase an OEM (Original Equipment Manufacturer) part, that component has undergone extensive testing, quality control, and certification. The manufacturer has validated its performance under various conditions and assumes liability for its safety. With 3D printed parts, you become the manufacturer—and with that comes responsibility.

The Unique Characteristics of 3D Printed Parts
3D printed parts are fundamentally different from injection-molded or machined components in several important ways that directly impact safety:
- Anisotropic Properties: Unlike solid manufactured parts, 3D printed components have different strength characteristics depending on the direction of force. Parts are typically weakest between layer lines, which can lead to unexpected failures under stress.
- Internal Structure Variations: Infill patterns, wall thickness, and layer adhesion all affect strength. Two visually identical parts can have vastly different mechanical properties based on print settings.
- Material Inconsistencies: Filament quality, moisture content, print temperature fluctuations, and cooling rates can create inconsistencies within a single part that aren't visible to the naked eye.
- Surface Finish Effects: Layer lines create stress concentration points that can initiate cracks under cyclic loading—a common condition in automotive applications where vibration is constant.
- Environmental Degradation: Many 3D printing materials degrade when exposed to heat, UV radiation, chemicals, or moisture—all common in automotive environments.
⚠️ Critical Safety Warning
Never 3D print safety-critical components such as brake system parts, steering linkages, suspension components, seat belt hardware, or any part whose failure could result in loss of vehicle control or serious injury. These components require materials, manufacturing processes, and testing that exceed what's achievable with consumer-grade 3D printing equipment. Always use certified OEM or aftermarket parts for safety-critical systems.
Safe vs. Unsafe: Categorizing Car Parts for 3D Printing
Not all car parts carry the same risk profile. Understanding which parts are appropriate for 3D printing—and which absolutely are not—is the first step toward safe automotive additive manufacturing. The key factors to consider are: what happens if this part fails, what conditions will it experience, and are there certification requirements?

The Safety Classification System
Professional automotive engineers categorize parts into safety tiers based on the consequences of failure. Here's how you should think about 3D printed components:
| Safety Category | Definition | 3D Print Safe? | Examples |
|---|---|---|---|
| Tier 1: Safety-Critical | Failure could cause loss of vehicle control, crash, or serious injury | NEVER | Brake components, steering parts, suspension arms, seat belt hardware, airbag components, wheel studs |
| Tier 2: Function-Critical | Failure could cause vehicle to become inoperable but unlikely to cause injury | CAUTION | Engine mounts, transmission brackets, radiator supports, fuel line clips near hot components |
| Tier 3: Secondary Function | Failure causes inconvenience or minor issues, no safety impact | CAREFUL | Interior trim clips, non-critical brackets, storage organizers, wire routing clips |
| Tier 4: Cosmetic/Comfort | No functional impact if failed, purely aesthetic or convenience items | YES | Cup holders, phone mounts, decorative trim, knobs, emblems, vent surrounds |
Parts You Should NEVER 3D Print
Regardless of how advanced your printer is or how strong your material claims to be, certain parts should never be 3D printed for road use:
- Brake System Components: Brake calipers, pistons, pads, rotors, master cylinder parts, brake lines, or any component in the braking system. Failure means inability to stop your vehicle.
- Steering Components: Tie rod ends, steering rack components, pitman arms, idler arms, steering column parts. Failure means loss of directional control.
- Suspension Parts: Control arms, ball joints, strut mounts, spring perches, sway bar links. These parts experience enormous forces and fatigue loading.
- Seat Belt Hardware: Buckles, anchors, pretensioner components, B-pillar mounts. These must withstand crash forces and are legally regulated.
- Wheel Components: Wheel studs, lug nuts, hub assemblies, wheel adapters. Wheel separation at speed is catastrophic.
- Airbag System Parts: Any component of the supplemental restraint system. These are precisely engineered life-saving devices.
- Fuel System Components: Fuel lines, injectors, fuel rail components, tank mounting hardware. Fire risk is severe.

💡 The Two-Question Safety Test
Before printing any car part, ask yourself these two questions:
- What's the worst that could happen if this part fails while driving at highway speed? If the answer involves loss of control, collision risk, fire, or injury—don't print it.
- Would I feel comfortable with my family members driving this vehicle with this part installed? If you hesitate, reconsider.
Material Selection for Safety: Choosing the Right Filament
The material you choose fundamentally determines whether your 3D printed car part will be safe for its intended application. Different automotive environments demand different material properties, and using the wrong material is one of the most common safety mistakes in automotive 3D printing. Understanding material science is essential for creating safe parts.

Critical Material Properties for Automotive Applications
When selecting materials for car parts, you must consider multiple environmental factors simultaneously:
- Heat Deflection Temperature (HDT): The temperature at which a material begins to deform under load. Dashboard surfaces can exceed 160°F (71°C) in summer; engine bay components experience 200°F+ (93°C+).
- Impact Strength: Resistance to sudden forces. Cars experience constant vibration and occasional impacts from road debris, potholes, and collisions.
- UV Resistance: Exterior parts face constant sun exposure. UV degradation causes embrittlement and failure over time.
- Chemical Resistance: Parts may contact gasoline, oil, brake fluid, coolant, cleaning chemicals, and road salt.
- Fatigue Resistance: Ability to withstand repeated stress cycles without failure. Automotive parts experience millions of vibration cycles.
- Moisture Absorption: Some materials absorb water and weaken. This is especially problematic in humid climates or for parts exposed to rain.
Material Safety Ratings for Automotive Use
| Material | Max Temp (°F/°C) | Impact Rating | UV Resistance | Chemical Resistance | Safe For |
|---|---|---|---|---|---|
| PLA | 140°F / 60°C | Low | Poor | Poor | Prototypes only—NOT for vehicle use |
| PETG | 180°F / 82°C | Medium-High | Good | Good | Interior parts, protected areas |
| ABS | 200°F / 93°C | High | Moderate | Good | Interior/under-hood non-critical parts |
| ASA | 200°F / 93°C | High | Excellent | Good | Exterior parts, badges, trim |
| Nylon PA6/PA12 | 180°F / 82°C | Very High | Good | Excellent | High-wear parts, hinges, clips |
| Carbon Fiber Nylon | 220°F / 104°C | Very High | Excellent | Excellent | Structural brackets (Tier 3 only) |
| Polycarbonate (PC) | 270°F / 132°C | Extremely High | Excellent | Very Good | Engine bay covers, high-temp areas |
| TPU/TPE (Flexible) | 175°F / 80°C | Medium | Good | Variable | Seals, bumpers, vibration dampeners |
🚫 PLA Is NOT Safe for Automotive Use
While PLA is the most common 3D printing material due to its ease of printing, it should never be used for actual vehicle parts. PLA begins to soften at temperatures easily reached inside a car on a sunny day. A dashboard-mounted phone holder printed in PLA could deform, drop your phone, and distract you while driving. Interior temperatures regularly exceed PLA's glass transition point. Always use automotive-grade materials like PETG, ABS, ASA, or nylon for any part that will actually be used in a vehicle.
Print Settings That Affect Safety: Optimizing for Strength
Even with the right material, improper print settings can result in parts that are dangerously weak. Understanding how print parameters affect mechanical properties is crucial for producing safe automotive components. A part printed at 15% infill with poor layer adhesion will fail long before the same geometry printed with optimized settings.

Critical Print Parameters for Safety
These settings directly impact the structural integrity of your printed parts:
- Infill Percentage: Higher infill means more material inside the part. For automotive applications, use minimum 50% infill for non-structural parts, 75-100% for any load-bearing components.
- Wall/Perimeter Count: More walls mean more strength. Use at least 4 perimeters for automotive parts; 6+ for anything experiencing stress.
- Layer Height: Thinner layers generally produce stronger parts with better layer adhesion, though printing time increases. Use 0.2mm or less for safety-relevant parts.
- Print Temperature: Printing too cold results in poor layer adhesion—the primary failure mode in 3D printed parts. Follow manufacturer recommendations and test for your specific setup.
- Print Orientation: Orient parts so that expected loads are perpendicular to layer lines, not parallel. Parts are weakest when pulled apart along the Z-axis.
- Cooling: Too much cooling can reduce layer adhesion; too little can cause deformation. Balance is key for strong parts.
Recommended Print Settings by Application
| Part Type | Infill % | Walls | Layer Height | Top/Bottom Layers | Notes |
|---|---|---|---|---|---|
| Decorative trim/emblems | 20-40% | 3-4 | 0.2mm | 4 | Appearance priority |
| Interior clips/mounts | 50-75% | 4-5 | 0.16-0.2mm | 5 | Balance strength/print time |
| Functional brackets | 75-100% | 5-6 | 0.12-0.16mm | 6 | Maximize strength |
| Exterior parts | 50-75% | 4-5 | 0.16-0.2mm | 5 | Use ASA for UV resistance |
| Under-hood components | 75-100% | 6+ | 0.12mm | 8 | High-temp material required |
🔧 Print Orientation Strategy
The orientation of your part on the build plate dramatically affects its strength. 3D printed parts are typically 4-5 times weaker when force is applied to separate layers compared to force applied parallel to layers.
Rule of thumb: Orient your part so that expected forces and stresses run parallel to the build plate (XY plane), not perpendicular to it (Z direction). For clips that will flex, orient them so the flex direction is in XY. For brackets under tension, ensure the load path doesn't rely on layer adhesion.
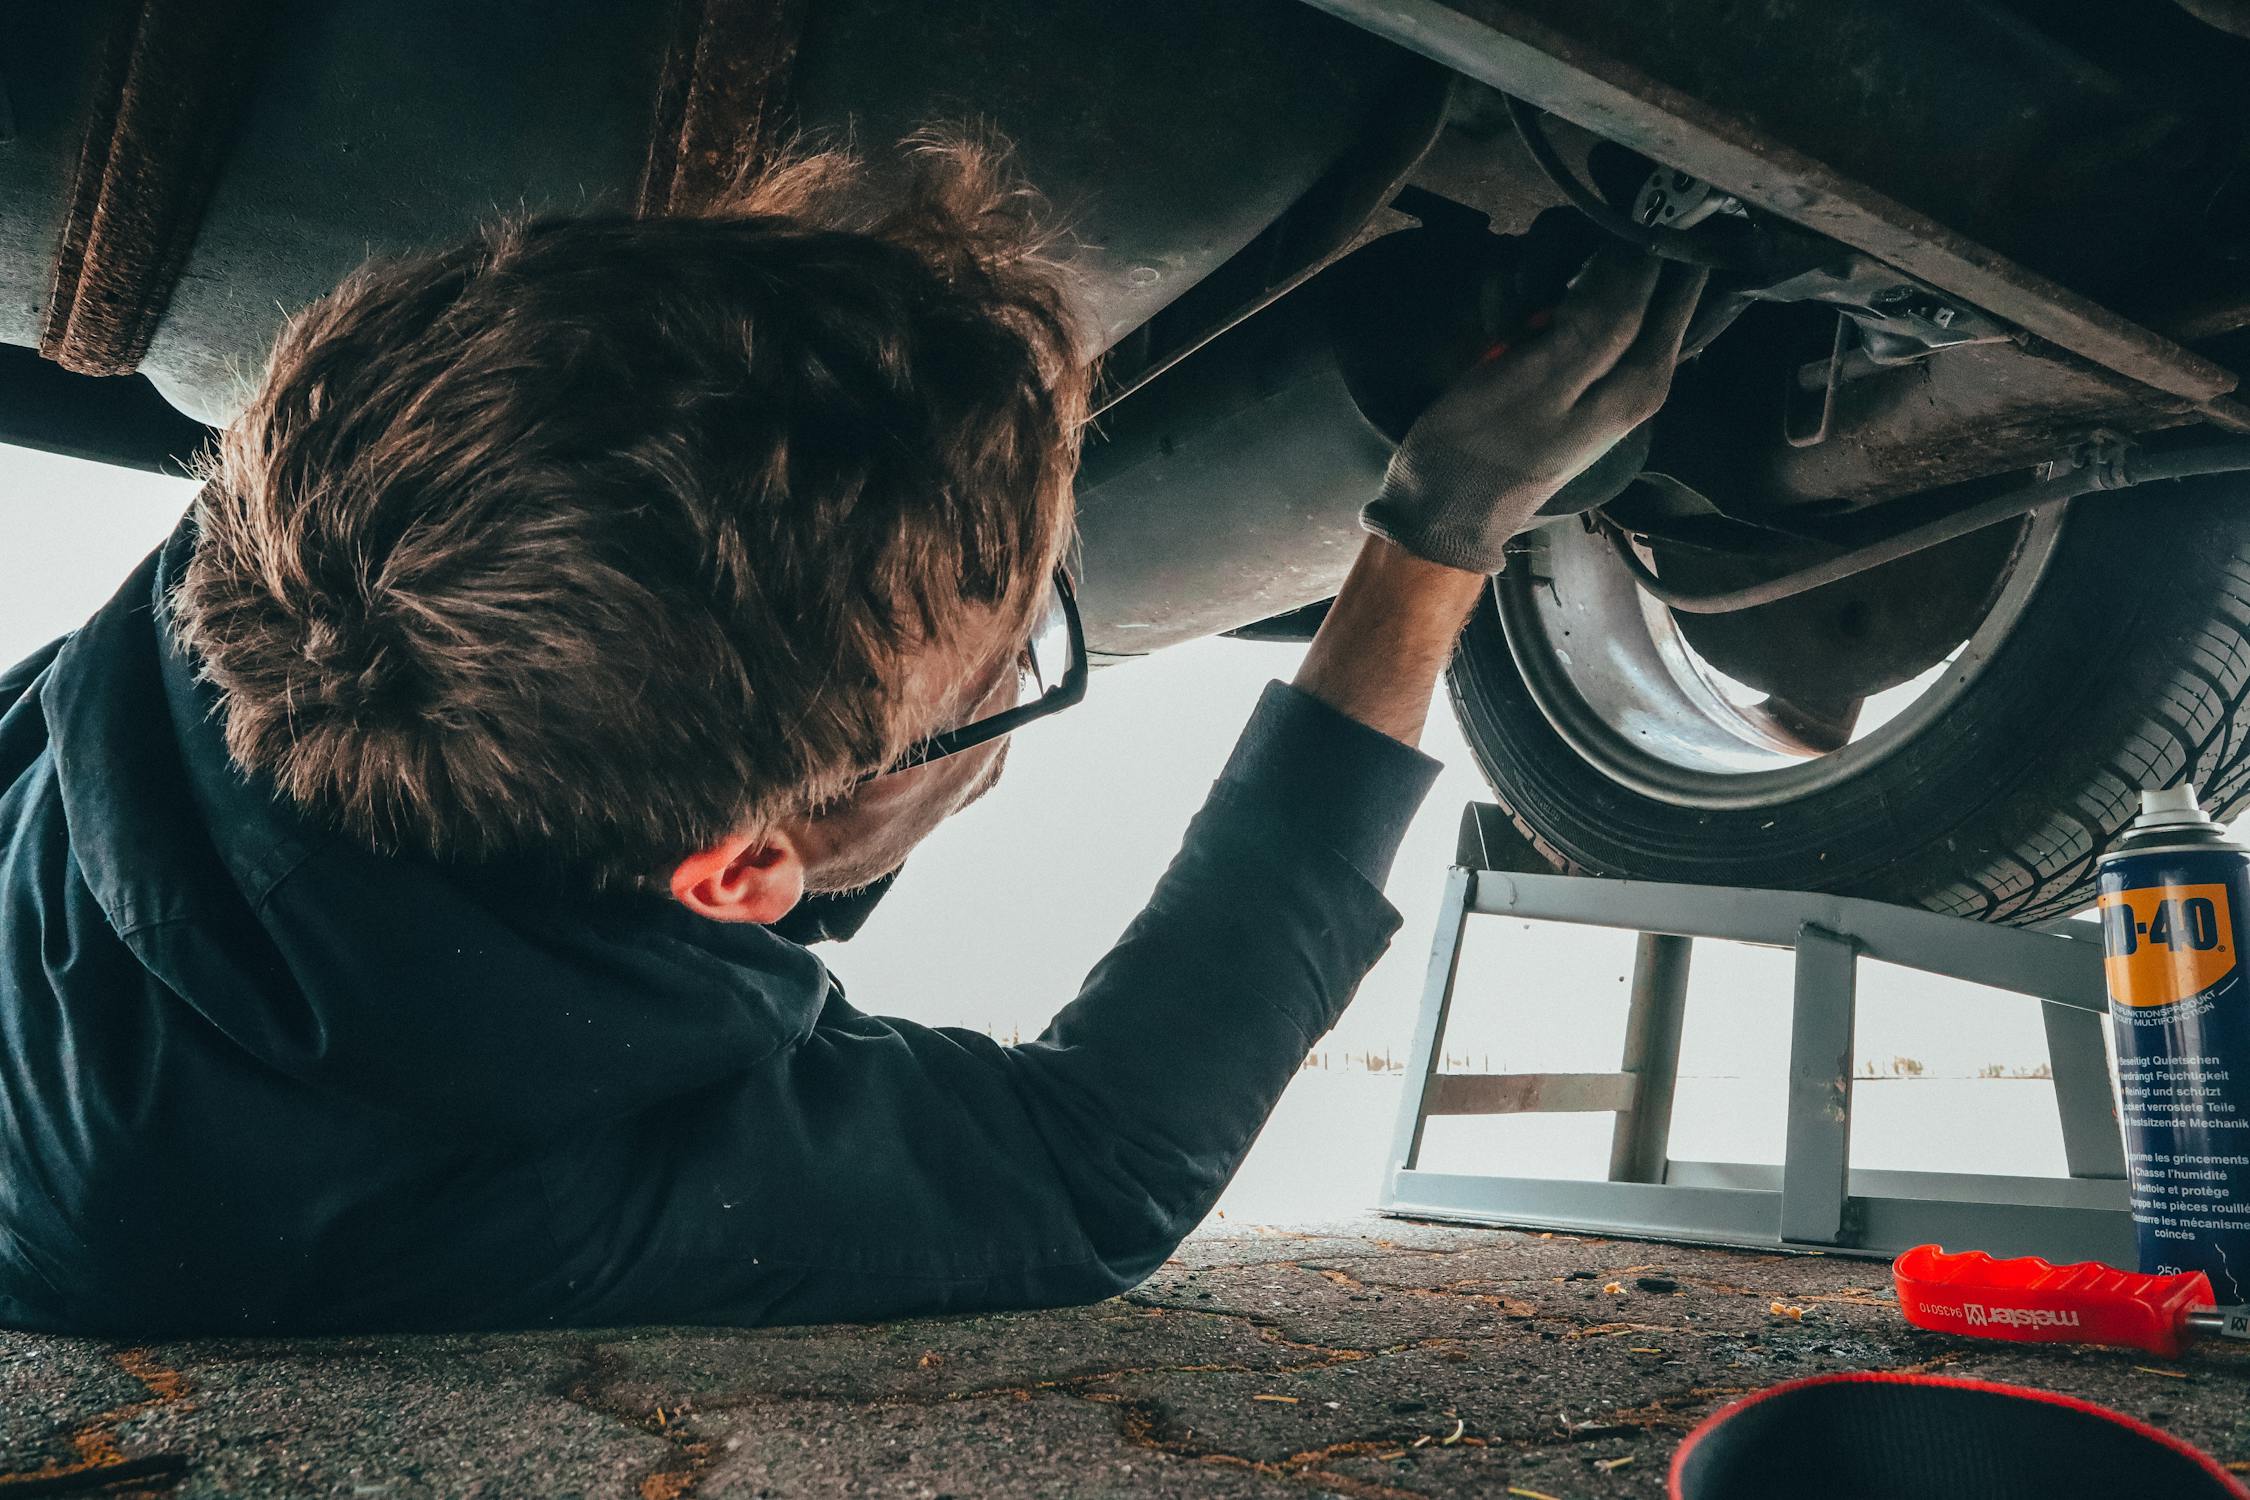
Testing Your 3D Printed Parts: Validation Before Installation
Professional manufacturers don't just make parts and ship them—they test extensively. While you won't have access to industrial testing equipment, there are practical ways to validate that your 3D printed car parts are safe before trusting them on the road. Testing should be considered mandatory for any functional part, not optional.

DIY Testing Methods
Before installing any 3D printed part in your vehicle, perform these tests:
- Visual Inspection: Examine the part carefully for layer delamination, voids, poor surface quality, or visible defects. Use a bright flashlight at an angle to reveal surface imperfections. Any visible defects indicate potential weak points.
- Flex Test: Gently flex the part to feel for unexpected creaking, cracking sounds, or areas of unusual weakness. The part should flex uniformly if the design allows for flex; localized movement suggests poor layer adhesion.
- Heat Test: Place the part in an oven at the maximum temperature it will experience in your vehicle (typically 160-180°F for interior parts) for 30 minutes. Check for deformation, warping, or softening. If it can't survive the oven, it won't survive your car.
- Impact Test: Drop the part from waist height onto concrete. Examine for cracks or damage. For clips and brackets, try to break them by hand. If you can break it easily, it won't survive road vibration.
- Fit Check: Test fit the part without final installation. Check for interference, proper clearances, and alignment. Forcing a poor-fitting part can create stress concentrations that lead to failure.
- Chemical Exposure Test: If the part will contact automotive fluids, place a small sample of the same material (print a test cube with identical settings) in that fluid for 24 hours. Check for swelling, softening, or degradation.
- Vibration Test: Temporarily install the part and take a short test drive on rough roads. Remove and inspect for any signs of wear, loosening, or fatigue. Repeat several times before committing to permanent installation.
✅ The "Print Two" Strategy
Always print at least two identical parts—one to test destructively, one to install. Your test part should be broken intentionally to understand its failure mode. How does it break? Does it shatter (brittle failure) or bend (ductile failure)? Does it fail at layer lines or through the material? This information tells you if your print settings and material choice are appropriate for the application.
Ongoing Safety Monitoring
Testing doesn't stop after installation. Implement a regular inspection routine:
- Weekly: Quick visual check of accessible 3D printed parts for obvious damage or movement
- Monthly: More thorough inspection including parts that require removal of panels or covers
- Seasonally: Complete inspection especially before and after extreme weather seasons (summer heat, winter cold)
- Immediately: After any impact, near-miss, or unusual sound from the vehicle
Replace any part showing signs of wear, cracking, deformation, or color change (which may indicate UV degradation). When in doubt, replace the part—your safety is worth more than the material cost of a reprint.
Legal Considerations and Vehicle Inspections
Beyond the engineering safety concerns, there are legal implications to using 3D printed parts on road vehicles. Understanding these requirements helps you stay compliant while still enjoying the benefits of custom automotive parts. Laws vary by jurisdiction, but some principles are universal.

General Legal Framework
In most jurisdictions, the legal requirements for vehicle modifications break down as follows:
- Roadworthiness: Vehicles must meet safety standards to be operated on public roads. Modifications that compromise safety can make a vehicle illegal to drive.
- Personal Use vs. Sale: You can generally 3D print parts for your own vehicle, but selling 3D printed car parts commercially typically requires meeting product safety standards and may expose you to liability.
- Intellectual Property: You cannot 3D print parts that infringe on patents, trademarks, or copyrights—even for personal use in some cases.
- Inspection Requirements: Some jurisdictions require periodic vehicle safety inspections. 3D printed parts may be flagged by inspectors if they affect safety-relevant systems.
- Insurance Implications: Modified vehicles may not be covered by insurance policies, especially if modifications contributed to an accident.
Passing Vehicle Inspections with 3D Printed Parts
To minimize issues during inspections:
- Avoid safety systems: Don't 3D print any parts related to brakes, steering, suspension, lighting, or emissions systems
- Keep documentation: Maintain records of what parts you've printed, including material specifications and print settings
- Match OEM appearance: For visible parts, design them to look factory-quality and match original specifications
- Be transparent: If asked by an inspector, be honest about modifications. Hiding modifications can have legal consequences.
- Know your rights: Understand your local laws. In many places, cosmetic modifications and non-safety interior parts are perfectly legal.
⚖️ Liability Consideration
If a 3D printed part fails and causes an accident, you could be held liable. This is another strong reason to limit 3D printing to non-safety-critical components. Consider: if this part failed and someone was injured, could you defend your decision to use it in court? If you can't confidently answer yes, don't use the part.
Safe Applications: What You CAN 3D Print
After all the warnings about what not to print, let's focus on the positive: there are countless car parts that are perfectly safe to 3D print when done properly. These applications let you enjoy the benefits of customization, cost savings, and the satisfaction of making your own parts without compromising safety.

Interior Parts
Interior components are generally the safest category for 3D printing:
- Cup holders and inserts: Custom cup holders sized for your favorite bottles or cups
- Phone and tablet mounts: Dashboard or vent-mounted holders designed for your specific device
- Storage organizers: Console organizers, glove box dividers, trunk organizers
- Knobs and switches: Shift knobs, HVAC controls, seat adjustment knobs
- Trim pieces: Replacement trim clips, vent surrounds, speaker grilles
- Coin holders: Custom toll booth change holders and organizers
- Sunglasses holders: Ceiling-mounted or console storage solutions
Exterior Parts
Exterior parts require UV-resistant materials but can be safely printed:
- Emblems and badges: Custom or replacement logos and trim pieces
- License plate frames: Personalized frames with your car club or personal design
- Mirror caps: Decorative covers (not the mirrors themselves)
- Antenna covers: Replacement bases and decorative tops
- Body trim clips: Those plastic clips that always break
- Mudflap brackets: Custom mounting solutions
- Tow hook covers: Replacement bumper plugs
Under-Hood Parts (Non-Critical)
With appropriate high-temperature materials, some engine bay components are suitable:
- Battery hold-down brackets: Custom brackets for aftermarket batteries
- Wire/hose routing clips: Organization clips for the engine bay
- Reservoir caps: Decorative caps for washer fluid, etc. (not radiator or pressurized systems)
- ECU/fuse box covers: Protective covers and enclosures
- Air intake ducting: Cold air intake components (non-MAF housing)
- Engine covers: Decorative engine bay dress-up parts

Classic Car Restoration
3D printing truly shines for classic car enthusiasts where OEM parts are no longer available:
- Dashboard components: Replacement vents, bezels, and trim
- Interior hardware: Window cranks, door handles, armrest components
- Emblems and badges: Recreate discontinued logos and trim pieces
- Gauge surrounds: Instrument cluster bezels and housings
- Vent controls: HVAC lever replacements
- Radio bezels: Surrounds for modern head units in classic dashes
🚗 Ready to Start Printing Safe Car Parts?
Join our community of automotive makers and access hundreds of tested, verified designs for 3D printed car parts. Every part in our library includes recommended materials, print settings, and safety notes.
Join the Community →Design Guidelines for Safe 3D Printed Car Parts
Whether you're designing your own parts or modifying existing designs, following sound engineering principles dramatically improves safety. Good design can compensate for some of 3D printing's inherent limitations while bad design can make even strong materials fail.

Structural Design Principles
- Avoid sharp corners: Use fillets (rounded corners) everywhere possible. Sharp corners create stress concentrations that initiate cracks. Minimum fillet radius of 1-2mm is recommended.
- Design for layer orientation: Consider how the part will be printed and orient critical features to minimize reliance on layer adhesion.
- Use generous wall thickness: Minimum 2mm walls for structural areas; 3mm+ for high-stress regions. Thin walls fail easily.
- Include draft angles: Angled surfaces print better than purely vertical walls and reduce stress risers.
- Distribute loads: Spread mounting points across larger areas rather than concentrating force on small tabs or pins.
- Add ribs for stiffness: Internal ribs can dramatically increase strength without adding much weight or material.
- Design for manufacturing tolerances: 3D printers have dimensional accuracy of ±0.2-0.5mm. Account for this in fits and clearances.
Clip and Snap-Fit Design
Many automotive parts use snap-fit clips. Designing these for 3D printing requires special attention:
- Increase tab thickness: 3D printed clips need to be thicker than injection-molded equivalents—often 1.5-2x thicker
- Reduce deflection distance: Design clips to deflect less than injection-molded versions; layer adhesion limits flexibility
- Add relief cuts: Small notches at the base of flexible features reduce stress concentration
- Test extensively: Clips experience repeated stress cycles when installed/removed; test your design multiple times before trusting it
- Consider print orientation: Clips should ideally flex in the XY plane, not the Z direction
🎨 Design for Inspection
Design your parts so that critical areas can be visually inspected after installation. Hidden parts that can't be checked are hidden problems waiting to happen. Include inspection windows, access holes, or design parts to be easily removable for periodic checking. If you can't see it, you can't know if it's failing.
Real-World Examples: Learning from Experience
The automotive 3D printing community has accumulated significant real-world experience. Learning from both successes and failures helps everyone make safer decisions. Here are documented examples from the community that illustrate important safety principles.
Success Stories
These applications have proven safe and reliable over extended use:
- Classic Porsche vent controls: A 911 owner successfully replaced 40-year-old cracked dashboard vents with ASA-printed replacements. After 3 years of use including Arizona summer heat, the parts show no degradation. Key factors: proper material choice (ASA for UV/heat), conservative design with extra wall thickness, thorough testing before installation.
- BMW cup holder inserts: The notoriously fragile E39 cup holders have been replaced thousands of times with PETG prints. The community-refined design is now stronger than the original and has proven reliable across climate extremes.
- Miata hardtop latches: Custom latches designed for aftermarket hardtops, printed in carbon fiber reinforced nylon, have proven reliable at track days with repeated installation/removal cycles.
Failures and Lessons Learned
These cautionary examples help illustrate what not to do:
- PLA phone mount failure: A phone mount printed in PLA sagged and dropped a phone onto the driver's lap while driving on a hot day. The distraction nearly caused an accident. Lesson: Never use PLA for parts inside a vehicle.
- Under-torqued battery bracket: A printed battery bracket cracked when overtightened, causing the battery to shift during driving. The resulting electrical short damaged the ECU. Lesson: Design for mechanical stress including installation forces; include torque limits in documentation.
- Wheel center cap ejection: A custom wheel center cap printed with inadequate retention force flew off at highway speed and struck a following vehicle. Lesson: Even "harmless" decorative parts can become projectiles; design proper retention features.
Building a Safety-First Mindset
Safe 3D printing for automotive applications isn't just about following rules—it's about developing an engineering mindset that automatically considers safety implications. This final section summarizes the key principles that should guide every decision.
The Safety-First Checklist
Before installing any 3D printed part in your vehicle, review this checklist:
- Is this a safety-critical part? (If yes, don't print it)
- What happens if this part fails at speed?
- Is the material appropriate for the operating environment?
- Are the print settings optimized for strength?
- Has the part been properly tested?
- Does the design follow sound engineering principles?
- Can the part be inspected after installation?
- Am I comfortable with my family riding in this vehicle?
If you can confidently answer yes to all applicable questions, proceed with installation. If any answer is no or uncertain, reconsider.
📚 Learn More from the Community
Join thousands of automotive makers sharing knowledge, designs, and safety best practices. Ask questions, share your projects, and learn from experienced community members.
Visit the Forum →Conclusion: Safe Innovation in Automotive 3D Printing
3D printing technology offers incredible opportunities for car enthusiasts, from restoring classic vehicles with unavailable parts to creating custom solutions that factory engineers never imagined. But this power comes with responsibility. As the manufacturer of your own parts, you must apply the same safety considerations that professional automotive engineers use.
The key takeaways from this guide are straightforward:
- Never print safety-critical components—brakes, steering, suspension, and other systems where failure could cause loss of control or injury
- Choose materials carefully—match material properties to the operating environment, and never use PLA for actual vehicle parts
- Optimize print settings for strength—higher infill, more walls, proper layer adhesion, and correct print orientation
- Test before trusting—validate parts with heat tests, impact tests, and destructive testing of duplicates
- Monitor ongoing condition—regular inspections catch problems before they become failures
- Design smart—follow engineering best practices including fillets, distributed loads, and inspection access
- When in doubt, don't—if you're uncertain about a part's safety, use a professionally manufactured alternative
By following these principles, you can enjoy the benefits of automotive 3D printing while keeping yourself, your passengers, and other road users safe. The maker community continues to push boundaries and share knowledge—explore our parts library to see what's possible, and join the community to connect with fellow automotive enthusiasts. Happy printing, and stay safe on the road!
Industry Standards and Professional Practices
While consumer-level 3D printing doesn't require certification, understanding how professional automotive manufacturers approach additive manufacturing provides valuable insights for hobbyists. Major automakers including BMW, Ford, and General Motors have extensive 3D printing operations that follow rigorous safety protocols.
What We Can Learn from Automotive OEMs
Professional automotive 3D printing operations employ several practices that home makers can adapt:
- Material Traceability: OEMs track every spool of filament, knowing exactly when it was manufactured, how it was stored, and which parts it produced. Home makers can adopt simplified version—label your filaments with purchase dates and store properly.
- Process Documentation: Every print parameter is recorded. Document your successful print settings for each part type so you can reproduce results consistently.
- Systematic Testing: Professional operations test samples from every batch. Print test specimens alongside important parts and destructively test them.
- Environmental Control: Industrial 3D printers operate in controlled environments. While you may not have a climate-controlled print room, you can monitor ambient conditions and avoid printing during temperature extremes.
- Design Validation: CAD models undergo finite element analysis (FEA) to predict stress concentrations. Free tools like Fusion 360 include simulation capabilities that hobbyists can use for critical parts.
The 2024 Cadillac Celestiq features over 115 3D printed parts—more than any other production vehicle. While these parts went through extensive validation that exceeds home capabilities, the fact that a major luxury automaker trusts additive manufacturing for production vehicles demonstrates the technology's maturity when properly applied.

Emerging Safety Standards
As 3D printing matures, industry organizations are developing standards relevant to automotive applications:
- ASTM International: Publishes standards for additive manufacturing materials, processes, and testing methods that provide a framework for quality assurance.
- ISO/TC 261: The International Organization for Standardization's technical committee focused on additive manufacturing standards.
- SAE International: Developing automotive-specific guidelines for 3D printed components.
While these standards primarily target industrial applications, hobbyists benefit from understanding the principles behind them. The emphasis on material qualification, process control, and systematic testing applies at every scale of operation.
🌟 Best Practice: Document Everything
Keep a "parts log" for your vehicle documenting every 3D printed component: what it is, when it was printed, material used, print settings, and installation date. This information is invaluable for troubleshooting if issues arise and helps you track which parts may need replacement due to age or wear.
Frequently Asked Questions About 3D Printed Car Parts Safety
Can 3D printed car parts pass vehicle inspection?
In most jurisdictions, non-safety-critical 3D printed parts (interior trim, cup holders, cosmetic pieces) don't affect inspection results. However, any modification to brakes, steering, emissions, or lighting systems may cause inspection failure. Always check local regulations before installing 3D printed parts.
How long do 3D printed car parts last?
With proper material selection, 3D printed car parts can last 5-10+ years. UV-resistant materials like ASA hold up well outdoors, while interior parts in PETG or ABS can last the life of the vehicle if not subjected to extreme stress. Regular inspection helps catch degradation early.
Are 3D printed parts safe in a car crash?
Non-structural 3D printed parts (trim, organizers, mounts) pose no additional crash risk compared to factory plastic parts. However, never 3D print any component designed to protect occupants in a crash—seat belt hardware, airbag components, or structural reinforcements must always be OEM certified.
What's the safest material for automotive 3D printing?
ASA offers the best overall safety profile for most automotive applications—excellent UV resistance, good heat tolerance (200°F/93°C), high impact strength, and chemical resistance. For interior-only parts, PETG provides a safer printing experience (no toxic fumes) with good performance. Carbon fiber reinforced nylon offers the highest strength for demanding applications.
Will my insurance cover accidents involving 3D printed parts?
Most insurance policies cover standard modifications, but this varies by insurer and modification type. Cosmetic 3D printed parts rarely affect coverage. However, if an investigation determines that a 3D printed part contributed to an accident, coverage could be disputed. Always avoid 3D printing safety-critical components and disclose significant modifications to your insurer.
Disclaimer: This guide is provided for educational purposes only. The author and 3D Printed Car Part assume no liability for damages resulting from 3D printed automotive parts. Always prioritize safety, comply with local laws, and consult with qualified professionals when in doubt about vehicle modifications.

