
Files (1)
Published material guidance; still check heat, UV, load, and printer compatibility.
A planning starting point only; wall count, orientation, and geometry often matter more than infill.
Slice the selected model with your final material, orientation, walls, and supports.
Saved setup guidance is used for material, infill, support, and per-file recommendation text; editable numbers are planning estimates only.
Reference shelf
Recommended filament for this print
Product references matched to the published material guidance. Confirm diameter, heat resistance, colour, and printer compatibility.
| Referenced item | What to verify | Price & availability |
|---|---|---|
| PETG filamentAmazon · Affiliate link | Amazon product page for 1.75 mm PETG; confirm colour, spool size, print temperature, seller, and delivery region. | Check price at Amazon |
| ABS filamentAmazon · Affiliate link | Amazon product page for 1.75 mm ABS; use an enclosure and suitable ventilation, and verify temperature requirements and seller. | Check price at Amazon |
Affiliate disclosure: if you buy through an eligible link, 3DPrintedCarPart may earn a commission at no extra cost to you. As an Amazon Associate I earn from qualifying purchases. Confirm product specifications, compatibility, seller terms, and vehicle safety before ordering or using anything. Amazon may redirect you to a nearby supported store; otherwise the original Amazon.com page remains available.
Unsure which one fits? Read the automotive filament guide.
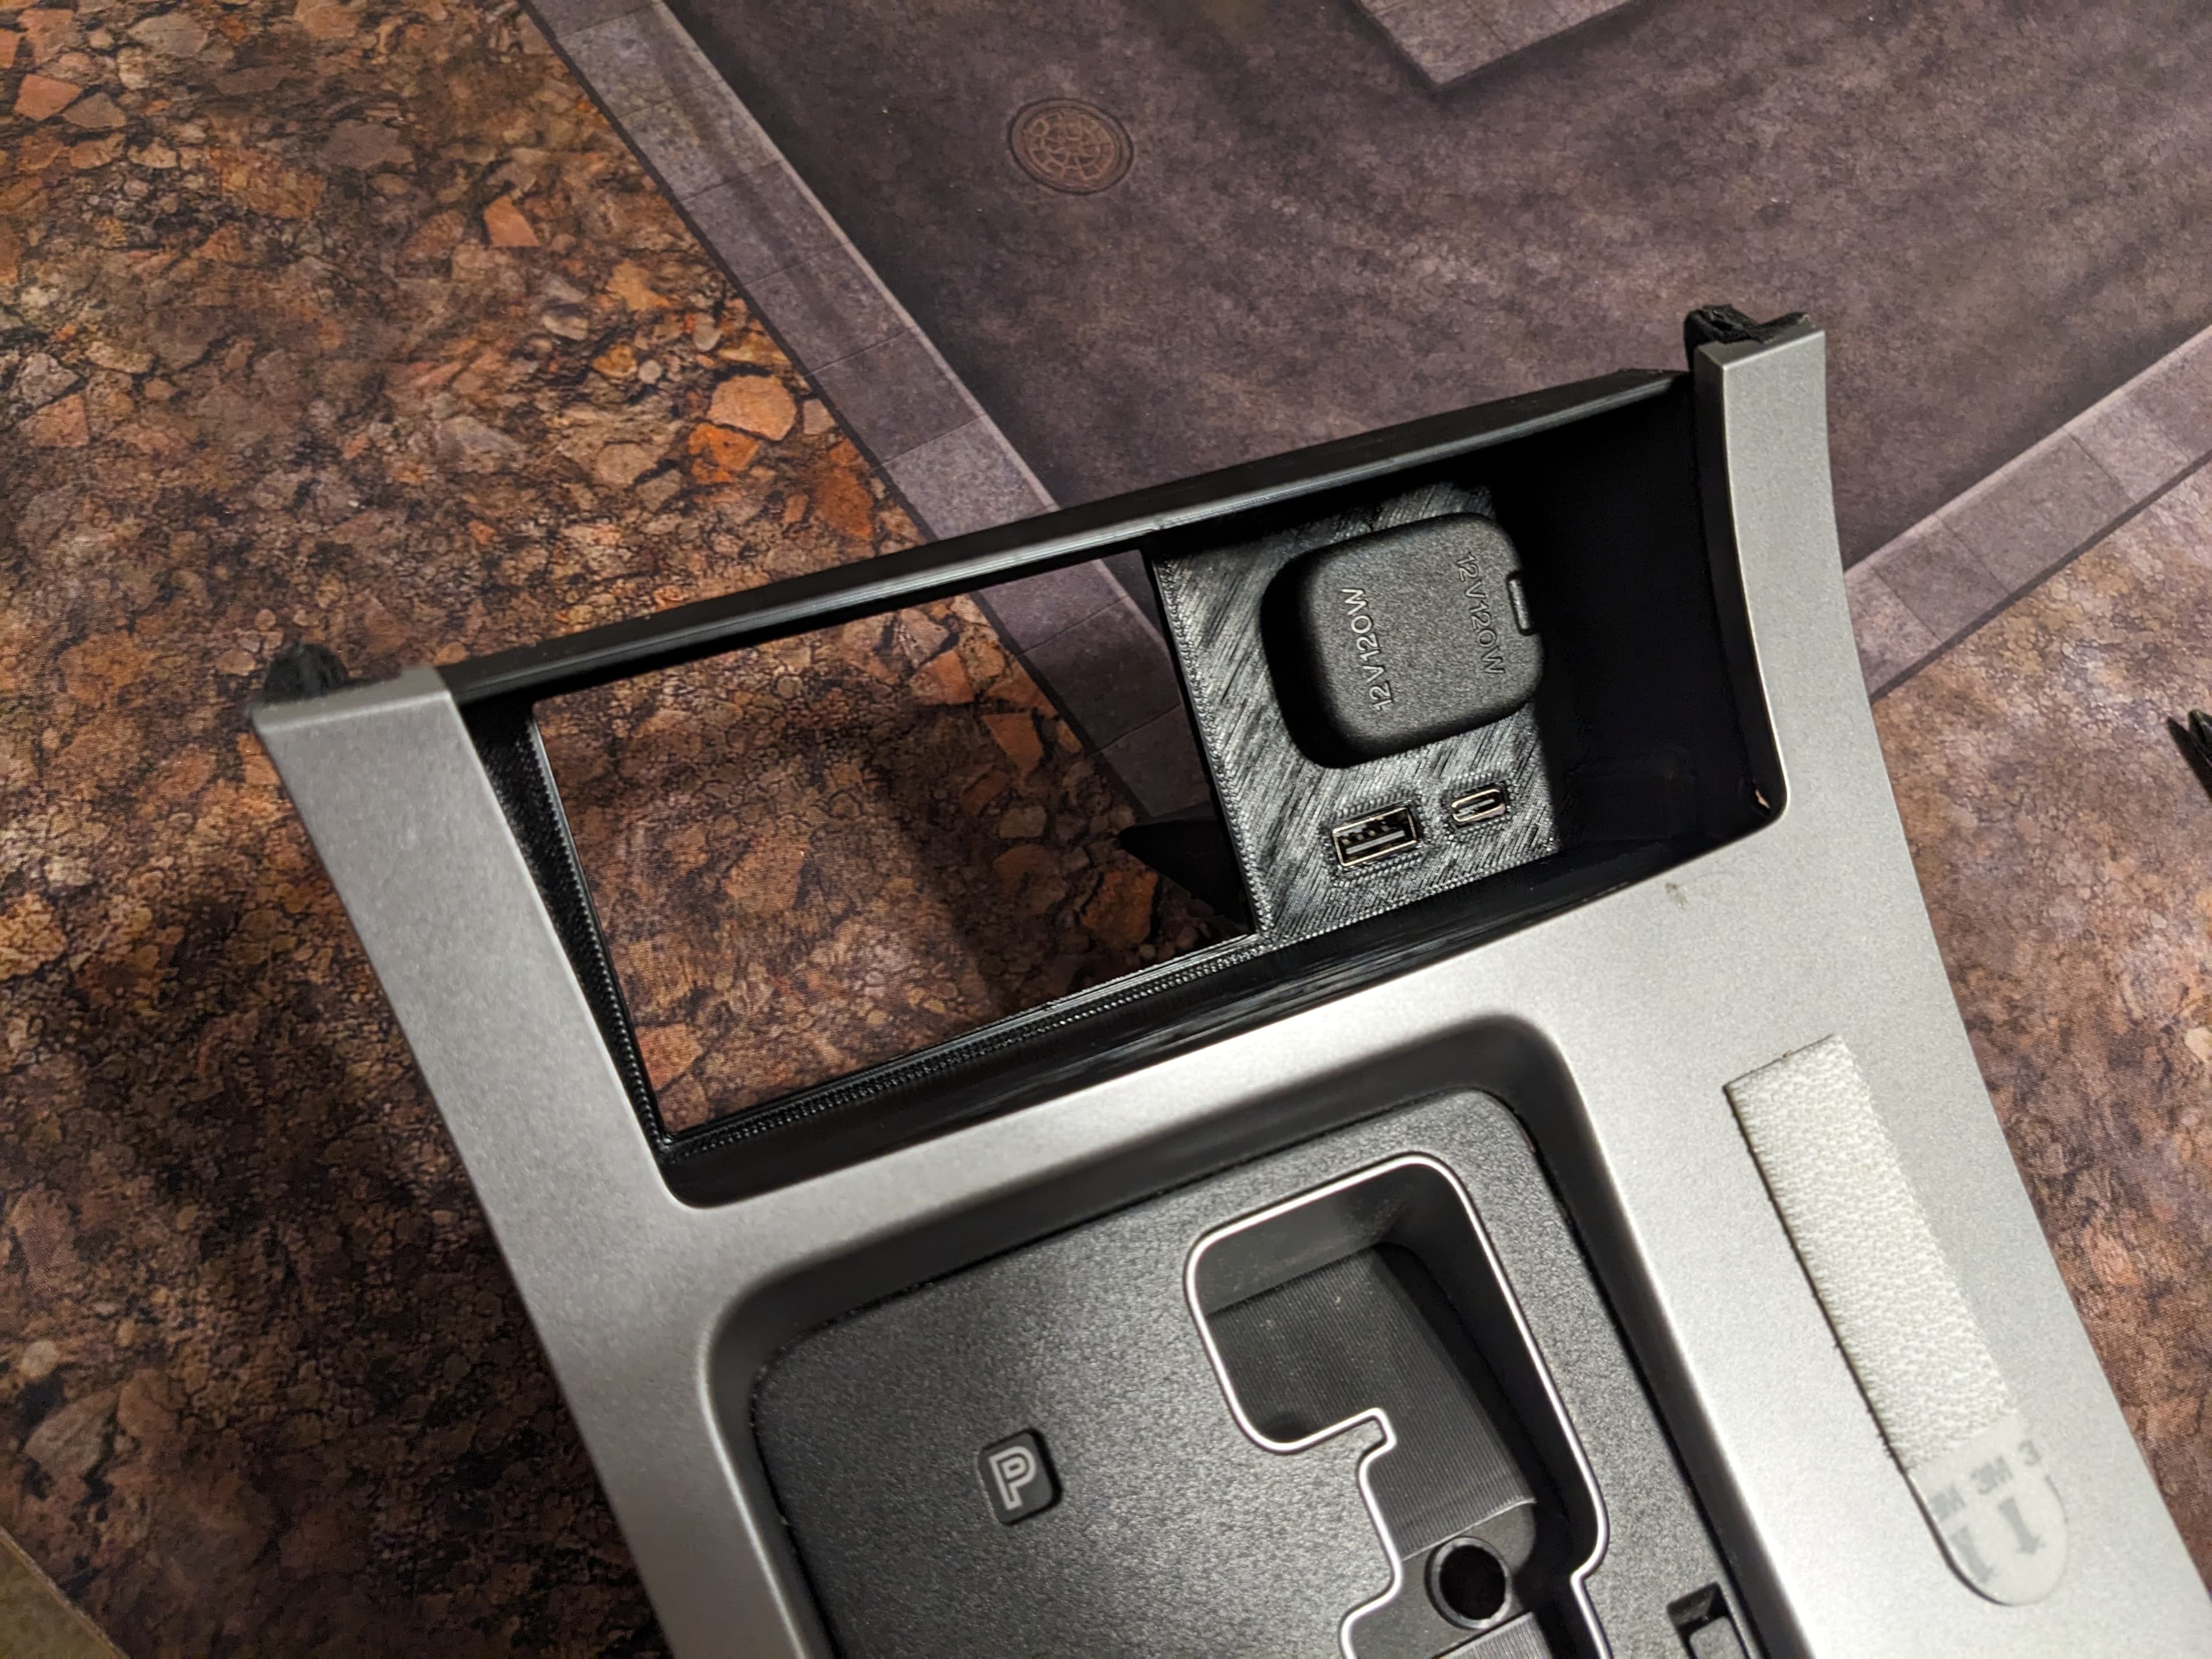
2011 Mazda 3 center console tray replacement
Print this part
Use the part context as a starting point, then confirm geometry-dependent values in your slicer.
Files
1 hosted model file
STL
Material start
PETG or ABS
Saved part guidance
Strength start
20-30% infill for durability, with 1.2-1.6 mm walls
Saved part guidance
Orientation / supports
verify in slicer
Exact totals
Slice for grams + time
Model geometry and final settings determine both
Vehicle exposure
Cabin/interior use; avoid high-heat zones
Open the STL, 3MF, or OBJ model in your slicer before printing. Exact grams, time, and final support placement come from the actual slice. Test-fit and heat-check the part before installing it in a vehicle.
License & use
The file license permits commercial reuse, subject to any applicable attribution or share-alike terms. License status does not verify vehicle fitment, OEM rights, design patents, or safety.

Shared by
3DPrintedCarPartDescription
This model replaces the portion of the center console tray that contains the 12V outlet. It adds holes for USB charging ports and a modular gap for a storage tray. The storage tray I modelled has spaces for pens/pencils and US quarters. This is not a thorough tutorial or a ready-to-go product and is provided only as a starting point for any tinkering you want to do with this component of the car. This project as I did it required these additional materials: USB charge board (I used a Coolgear Chargeit! USB-A/USB-C board ) 2-4 M3 screws for mounting the board Epoxy for attaching the board mounting tray. This could be eliminated by printing as one piece. 12V outlet (salvaged from the stock tray) 2 ~20-gauge butt splice connectors Some 20-gauge wire I spliced wires for the USB board onto the wires for the 12V outlet. This was tricky, they didn't leave a lot of extra wire to work with in there. Printing: Use ABS or PETG if can interior will get hot - PLA can warp severely in heat. Change log: v24: improved 12V plug fit.
Compatible Cars
Originally published on printables.com by BMacIntosh · License: Public Domain
Share whether this print actually fits a real car. Installed photos and material notes make the catalog more trustworthy.
Related Parts
Most specific car + model + year + category matches first, with popular parts mixed in.
Mazda3 Console Cable Plug Cap Replacement
MX5 NB Centre Console Lid
Miata NB2 Console Lid Stay
Smartphone Dock for MX-5 NA Ashtray
1999 - 2000 NB1 Mazda Miata Console Hinge
2004-2010 Hyundai Sonata Headlight Dust cap
Hyundai

