
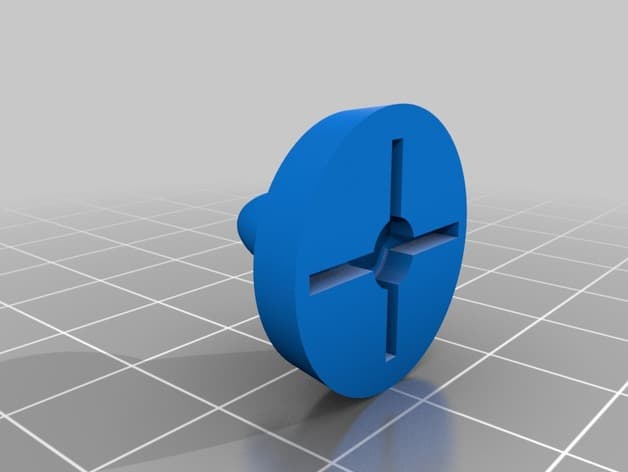
370Z B pillar finisher clips
Print this part
Use the part context as a starting point, then confirm geometry-dependent values in your slicer.
Files
Source link only
No hosted model files
Material start
PETG or ASA for durability and heat resistance
Saved part guidance
Strength start
20-30% infill for strength without excessive weight
Saved part guidance
Orientation / supports
verify in slicer, but likely needed for pawl part if printed horizontally
Exact totals
Slice for grams + time
Model geometry and final settings determine both
Vehicle exposure
Cabin/interior use; avoid high-heat zones
Download the model at its source, then confirm the format is supported by your slicer. Exact grams, time, and final support placement come from the actual slice. Test-fit and heat-check the part before installing it in a vehicle.
License & use
Files stay with the original publisher; this catalog entry does not grant hosting or resale rights. License status does not verify vehicle fitment, OEM rights, design patents, or safety.

Shared by
3DPrintedCarPartDescription
The B pillar cover/finisher on my 370Z was apparently mistreated by a previous owner, and one day just decided to fall off when I brushed against it! It looked to be shoddily glued back on with silicone blobs, a poor substitute for the original clips. New ones are $90 each, and owning a 3D printer I find it difficult to shell out that kind of money for a chunk of plastic. So I scraped and sanded off all of the two molded-on brackets, and most of what remained of the molded on pawl at the top side. Then I drew up these replacements and epoxied them on. Looks and works good as new, and better than when I bought the vehicle. Its easy to see why they broke originally, the stock brackets are super thin and molded from brittle PMMA. the first attempt to remove them without a trim removal tool brobably broke all of them off... I didn't get any pictures of the backside after gluing on the replacement parts, but the other B pillar is probably in the same state so I'll try to remember to get some pics when I fix it! Brackets are best printed vertically, so the part isn't stressed along layer lines where its liable to crack. For the same reason the pawl part is best printed horizontally or it could snap at the thin section. No supports necessary for the brackets printed vertically on end, but the pawl will need some if you print horizontally. materials with strong layer adhesion may not need to. I'll upload a square based pawl to make printing horizontally easier at some point. Don't grind off all of the original pawl, leave about 2mm of the + shaped base to center the replacement 3D printed pawl onto. Sand/scuff the back of the pmma finisher/cover well or the epoxy wont stick. If you destroy the little nylon clips trying to get them out of the grommets on the car like I did, you can find them here or simply search for 76988-4N000. They snap right into the printed brackets, and then the whole thing pops right back onto the car.
Compatible Cars
Originally published on thingiverse.com by Matthew Sylvester (earlynerd) · License: CC BY-NC
Share whether this print actually fits a real car. Installed photos and material notes make the catalog more trustworthy.
Related Parts
Most specific car + model + year + category matches first, with popular parts mixed in.
370z Steering Wheel Bolt Cover
Nissan 370z Tweeter mount
370Z Rear Sun Shade Mount
Nissan 370z upper storage bin cover
Nissan / Infiniti oil fill funnel
Nissan
2004-2010 Hyundai Sonata Headlight Dust cap
Hyundai

