
Files (4)
Published material guidance; still check heat, UV, load, and printer compatibility.
A planning starting point only; wall count, orientation, and geometry often matter more than infill.
Choose the needed variant, then slice it for grams, cost, and print time.
Saved setup guidance is used for material, infill, support, and per-file recommendation text; editable numbers are planning estimates only.
Reference shelf
Recommended filament for this print
Product references matched to the published material guidance. Confirm diameter, heat resistance, colour, and printer compatibility.
| Referenced item | What to verify | Price & availability |
|---|---|---|
| PETG filamentAmazon · Affiliate link | Amazon product page for 1.75 mm PETG; confirm colour, spool size, print temperature, seller, and delivery region. | Check price at Amazon |
Affiliate disclosure: if you buy through an eligible link, 3DPrintedCarPart may earn a commission at no extra cost to you. As an Amazon Associate I earn from qualifying purchases. Confirm product specifications, compatibility, seller terms, and vehicle safety before ordering or using anything. Amazon may redirect you to a nearby supported store; otherwise the original Amazon.com page remains available.
Unsure which one fits? Read the automotive filament guide.
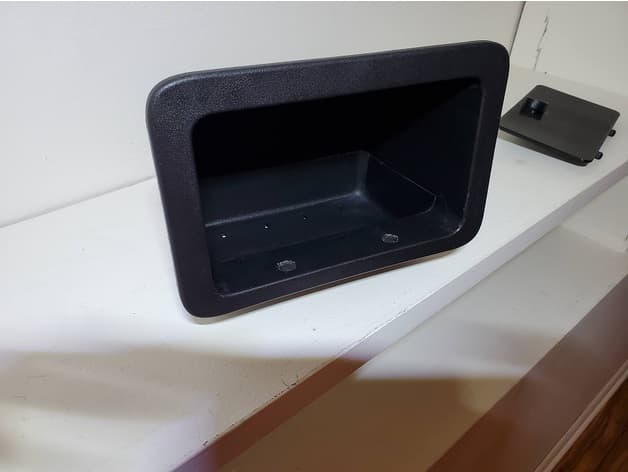
Bed Pocket Door for Tacoma
Print this part
Use the part context as a starting point, then confirm geometry-dependent values in your slicer.
Files
4 hosted model files
STL
Material start
PETG
Saved part guidance
Strength start
20-30% infill with 2-3 walls for durability
Saved part guidance
Orientation / supports
supports likely, verify in slicer
Exact totals
Slice for grams + time
Model geometry and final settings determine both
Vehicle exposure
Cabin/interior use; avoid high-heat zones
Open the STL, 3MF, or OBJ model in your slicer before printing. Exact grams, time, and final support placement come from the actual slice. Test-fit and heat-check the part before installing it in a vehicle.
License & use
The file license permits commercial reuse, subject to any applicable attribution or share-alike terms. License status does not verify vehicle fitment, OEM rights, design patents, or safety.

Shared by
3DPrintedCarPartDescription
Instructions: Step 1:Print out the latest version of the Hole Jig.stl in PLA plastic. You might want to print 2 of these, since they might get damaged in step 2. Step 2: Use the jig to cut out the 2 holes (bottom) and 1 slot (top) of the bed pocket. I suggest using a dremel. Step 3: Then print out Version 5 of the door WITH SUPPORTS in PETG plastic Print out the latch in PETG Print out the Knob in PETG Step 4: Get a no. 8 machine screw. The threaded portion needs to be around 35mm long; can always cut it shorter. Cut the head of the screw off, super glue it into the knob you just printed. Step 5:Next, dremel a flat side in the machine screw, turing it from a round shaft to a D shaped shaft. The flat side should face UP when the latch is "closed". You'll have to dremel the screw little by little, testing to see if it fits into the latch. This is just so that the knob orientation lines up with the other doors in the bed of the truck. The latch piece has a flatside in the inner diamater. Step 6: Then get the spring out of a Pilot G2 pen and an Airsoft BB. Load the spring and the BB into the latch mechanism. The Door piece has a track and detents for the ball. Step 7: Assemble the door, latch and knob. Put some loctite on the threads to hold the nut in place. NOTE: May need to trim the holes in the pocket to fit just right.
Compatible Cars
Originally published on thingiverse.com by Kyle Burrell (kylesburrell) · License: CC BY
Share whether this print actually fits a real car. Installed photos and material notes make the catalog more trustworthy.
Related Parts
Finding specific fitment/category matches first.

