Earn money selling original 3D car part models.
Start sellingEarn money selling original 3D car part models.
Start sellingEarn money selling original 3D car part models.
Start selling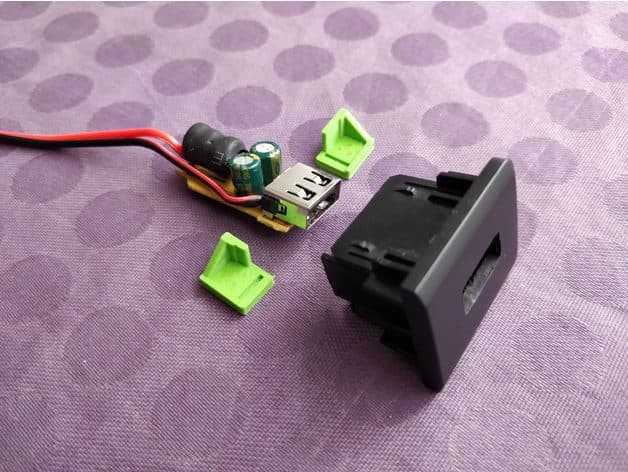
Reference shelf
Product references matched to the published material guidance. Confirm diameter, heat resistance, colour, and printer compatibility.
| Referenced item | What to verify | Price & availability |
|---|---|---|
| PETG filamentAmazon · Affiliate link | Amazon product page for 1.75 mm PETG; confirm colour, spool size, print temperature, seller, and delivery region. | Check price at Amazon |
| ASA filamentAmazon · Affiliate link | Amazon product page for 1.75 mm ASA; use an enclosure and suitable ventilation, and confirm seller and regional availability. | Check price at Amazon |
Affiliate disclosure: if you buy through an eligible link, 3DPrintedCarPart may earn a commission at no extra cost to you. As an Amazon Associate I earn from qualifying purchases. Confirm product specifications, compatibility, seller terms, and vehicle safety before ordering or using anything. Amazon may redirect you to a nearby supported store; otherwise the original Amazon.com page remains available.
The file license permits commercial reuse, subject to any applicable attribution or share-alike terms. License status does not verify vehicle fitment, OEM rights, design patents, or safety.
Shared by
Clément LP (Peemouse)English below ___________ Dans l'objectif de mettre des prises USB à la place de cache plein sur le tableau de bord de mon Volkswagen T5, j'ai dû créer un "étrier" pour maintenir l'USB contre l'arrière du cache sans interférer avec le mécanisme de branchement/débranchement. L'étrier est prévu pour ce modèle d'allume-cigare-USB: https://a.aliexpress.com/_v7du4F Le perçage doit être parfaitement centré sur le cache. Note: imprimer le plus fin possible (0.10 était très bien pour moi). Pour le maintien des prises, encoller les étriers de colle Epoxy et les coller contre le cache. __________ In the purpose of putting USB outlets to the middle dash panel of my VW T5, I had to design a bracket for mounting the USB PCB on the cap. The cap is designed for this car USB charger model: https://a.aliexpress.com/_v7du4F The cutout has to well centered on the cap. Note: print at a fine layer height (0.10 was fine for me). Put Epoxy glue on the bracket and apply against the back of the cap.
Originally published on thingiverse.com by Clément LP (Peemouse) · License: CC BY
Browse categories
Jump to interior, exterior, accessories, dashboard, mechanical, or tools hubs when you need a different kind of replacement part.
Share whether this print actually fits a real car. Installed photos and material notes make the catalog more trustworthy.
Other projects by us
Building tools that make life easier
Start a fitment, printing, or design discussion with this part already attached.



