RX7 Side Seal Clearance Tool
Files (1)
Reference shelf
Recommended filament for this print
Product references matched to the published material guidance. Confirm diameter, heat resistance, colour, and printer compatibility.
| Referenced item | What to verify | Price & availability |
|---|---|---|
| PETG filamentAmazon · Affiliate link | Amazon product page for 1.75 mm PETG; confirm colour, spool size, print temperature, seller, and delivery region. | Check price at Amazon |
Affiliate disclosure: if you buy through an eligible link, 3DPrintedCarPart may earn a commission at no extra cost to you. As an Amazon Associate I earn from qualifying purchases. Confirm product specifications, compatibility, seller terms, and vehicle safety before ordering or using anything. Amazon may redirect you to a nearby supported store; otherwise the original Amazon.com page remains available.
License & use
The file license permits commercial reuse, subject to any applicable attribution or share-alike terms. License status does not verify vehicle fitment, OEM rights, design patents, or safety.
Shared by
Cliff Burger (cs900)Designers selling from the US, Canada, the UK, the EU/EEA (except Iceland), Switzerland and Gibraltar can also list separate original designs for sale and receive 80% of the listing price, paid out by Stripe in your local currency (conversion fees may apply). Claiming credits you here; it doesn't put this imported part up for sale.
Description
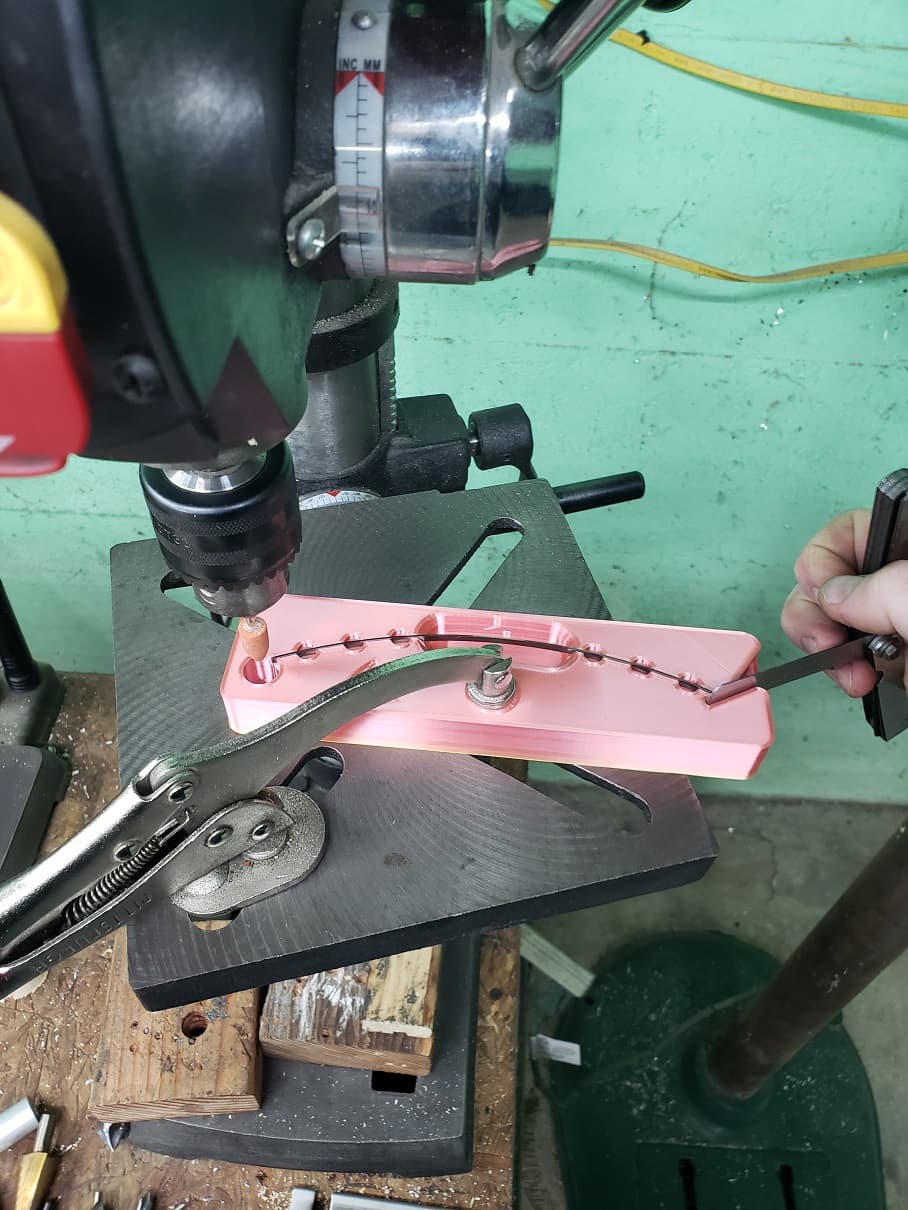
for those of us who enjoy building our own engines, this tool is meant to help aid in setting the correct clearance between the side seal and the corner seal. Things you'll still need: 1) drill press with locking table 2) drill press clamp. Harbor Freight has these for super cheap. Might be able to get away with a C-clamp as well. 3) thickness gauges 4) dremel type grinding wheel. Ideally it would be.433" (11mm) in diameter, but i have yet to find one exactly that size. directions for use: 1) use a drill bit or preferably a pointed grinding stone in the spindle, and push it into the round hole so it bottoms out on the fixture. This will center the fixture on the drill press spindle. 2) while keeping pressure down on the fixture with the bit/wheel, lock the table on the drill press, and clamp the fixture down on the button. The button is a reinforced part of the print, and will automatically print out this way, so no need to be gentle. You don't want it to move AT ALL. 3) Once everything is locked down, raise the bit/wheel and insert a side seal. If it's a new seal move the seal so when the grinding wheel comes down it'll just barely clean clean up the end of the seal. A bit of black sharpie on the end will make it very visible if you got full clean up. Making sure the side seal is seated down against the fixture, turn the spindle on and slowly grind the end on the seal. 4) flip the seal around and do the same thing. 5) test fit in the rotor. You may need to hit it with a bit of sand paper to knock of any burr the stone made. The seal should still be long at this point. Put the seal back in the fixture and move it so the stone just barely touches, but isn't really taking any material off. Use your shims and fill the entire space between the seal and the fixture on the right hand side. 6) once you know what that number is, add.001" shim to that number and regrind the seal. 7) test fit again. 8) rinse and repeat until you have the desired clearance.
Compatible Vehicles
Originally published on thingiverse.com by Cliff Burger (cs900) · License: CC BY 4.0
Browse categories
Browse other part families
Jump to interior, exterior, accessories, dashboard, mechanical, or tools hubs when you need a different kind of replacement part.
Verified by drivers
Share whether this print actually fits a real car. Installed photos and material notes make the catalog more trustworthy.
Comments (0)
Part lists
Ask the community about this part
Start a fitment, printing, or design discussion with this part already attached.
Related Parts
Most specific car + model + year + category matches first, with popular parts mixed in.