Earn money selling original 3D car part models.
Start sellingEarn money selling original 3D car part models.
Start sellingEarn money selling original 3D car part models.
Start selling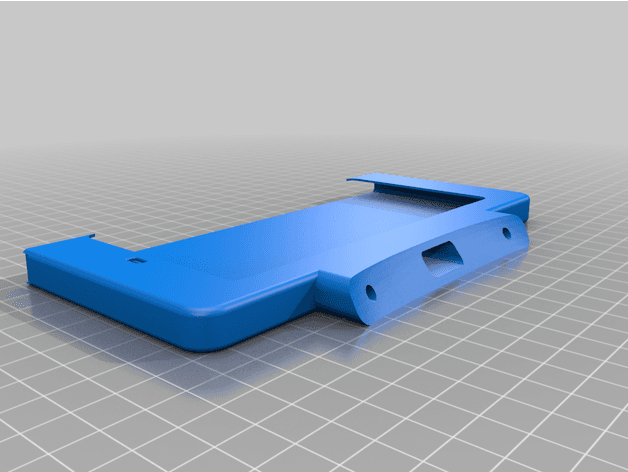
Reference shelf
Product references matched to the published material guidance. Confirm diameter, heat resistance, colour, and printer compatibility.
| Referenced item | What to verify | Price & availability |
|---|---|---|
| PETG filamentAmazon · Affiliate link | Amazon product page for 1.75 mm PETG; confirm colour, spool size, print temperature, seller, and delivery region. | Check price at Amazon |
| ASA filamentAmazon · Affiliate link | Amazon product page for 1.75 mm ASA; use an enclosure and suitable ventilation, and confirm seller and regional availability. | Check price at Amazon |
Affiliate disclosure: if you buy through an eligible link, 3DPrintedCarPart may earn a commission at no extra cost to you. As an Amazon Associate I earn from qualifying purchases. Confirm product specifications, compatibility, seller terms, and vehicle safety before ordering or using anything. Amazon may redirect you to a nearby supported store; otherwise the original Amazon.com page remains available.
The file license permits commercial reuse, subject to any applicable attribution or share-alike terms. License status does not verify vehicle fitment, OEM rights, design patents, or safety.
Shared by
Nicholas Nguyen (osunick)This is a custom mount for a Pixel 2XL for the Open Source CANdash project for the Tesla Model 3 and Y. It can be used for anything you want a phone for, and is intended to provide a clean way to mount a smartphone. You will need some parts to complete this build. 1. Right angle USB-C power cable to run down the side and a usb power source under the dash. 2. 2 M4 self tapping screws, I used fender screws from a Porsche, at least 15mm long 3. I recommend getting a spare upper steering column trim piece from eBay or Tesla, since you will need to drill holes in it. It should cost between $50 and $80 typically. Installation instructions: 1. Print the template file and place it on top of your steering column trim (please do not do this in the car), the shape will only fit one way. Use this to drill two 5mm holes straight through the trim. Once you do this you can use screws to hold this in place while you dremel/ream out the center hole. 2. Print the body.stl file, split it into objects in your slicer and print face down, this design minimizes overhangs and will not require supports. 3. Print the two washers in washers.stl. Your M4 screws will go through these and the trim and and thread into the base of the body. The screws will be slightly smaller than the holes so you will have some play to make sure the body is aligned as you tighten the screws. 4. Remove your upper steering column trim (plenty of videos on youtube) and run the usb-c cable through the mount and trim and down under your dash. I found running a long ziptie from under the dash to the column and taping the end of the usb cable to the ziptie let me fish it through easily. 5. connect this to USB power, I recommend tapping the left trailer brake controller for switched power in the left footwell. 6. Print the top. If you print it with the buttons facing the build plate it can be entirely printed in place. Otherwise, split to objects and arrange the pieces so their largest face is on the build plate. You can then assemble this piece with the large buttons in place, with the large parts of the button faces facing upward. Use M2 self tapping screws to assemble (I used servo horn screws) 7. mount upper column trim with mount onto lower trim. Connect power to phone and ensure the phone is getting power. Leave the front of the mount off as you feed cable down into the steering column. Once the play is gone and the phone is in place, simply snap the front on the mount. 8. Snap the top with the buttons aligned with the phone buttons and you are done.
Originally published on thingiverse.com by Nicholas Nguyen (osunick) · License: CC BY
Browse categories
Jump to interior, exterior, accessories, dashboard, mechanical, or tools hubs when you need a different kind of replacement part.
Share whether this print actually fits a real car. Installed photos and material notes make the catalog more trustworthy.
Other projects by us
Building tools that make life easier
Start a fitment, printing, or design discussion with this part already attached.



