
Files (1)
Reference shelf
Recommended filament for this print
Product references matched to the published material guidance. Confirm diameter, heat resistance, colour, and printer compatibility.
| Referenced item | What to verify | Price & availability |
|---|---|---|
| PETG filamentAmazon · Affiliate link | Amazon product page for 1.75 mm PETG; confirm colour, spool size, print temperature, seller, and delivery region. | Check price at Amazon |
| ASA filamentAmazon · Affiliate link | Amazon product page for 1.75 mm ASA; use an enclosure and suitable ventilation, and confirm seller and regional availability. | Check price at Amazon |
Affiliate disclosure: if you buy through an eligible link, 3DPrintedCarPart may earn a commission at no extra cost to you. As an Amazon Associate I earn from qualifying purchases. Confirm product specifications, compatibility, seller terms, and vehicle safety before ordering or using anything. Amazon may redirect you to a nearby supported store; otherwise the original Amazon.com page remains available.
Toyota Brake Fluid Reservoir Cap
License & use
The file license permits commercial reuse, subject to any applicable attribution or share-alike terms. License status does not verify vehicle fitment, OEM rights, design patents, or safety.

Shared by
3DPrintedCarPartDescription
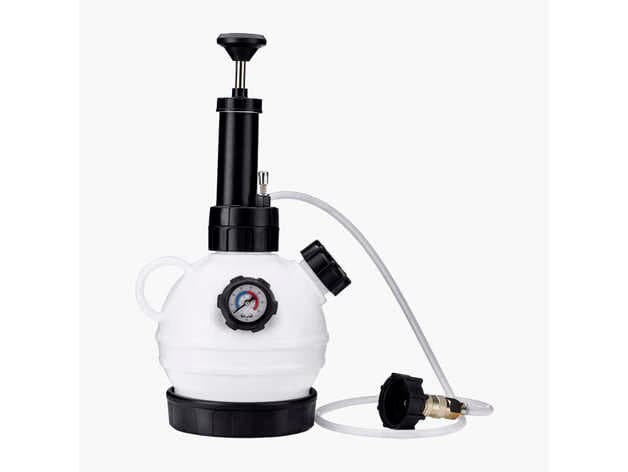
Since the brake fluid changer kit I bought, a very common one on the net, didn't have a cap that fit I made this for my 2021 Toyota GR Yaris, but I'm sure this fits a number of Toyota models. I've printed this with ASA filament which seems to withstand the quite aggressive brake fluid well. If you want to print with another filament type TEST it first so the brake fluid doesn't break down the filament and mixes it with the brake fluid in your car! I suggest you print with 100% infill, mainly to have good margin and be sure you get it fully airtight. You need to make a round 65 mm diameter rubber seal to put in the cap to help the air tight seal of the reservoir. Cut out a 35mm diameter hole in the rubber seals middle. The cap is oversized only to make it easy to cut out this rubber seal with no particular precision, you have quite a lot of margins when cutting it out. I used two M5 x 24 screws plus two nuts to adjust the height, and to get the right pressure from the cap onto the rubber seal. Height obviously depends on how thick your rubber seal is. IMPORTANT: depending on your printer calibration and filament used the two screws can get a weaker hold into the plastic lid cap and be pulled out slightly of the force from the over pressurized reservoir. Please test carefully. If all else fails you can make the holes all the way through the cap and use longer screws and nuts on the other side. To make sure there are no air leaks through these holes you can apply epoxy glue on top of the nuts.
Compatible Vehicles
Originally published on thingiverse.com by Magnus Thomé (MagnusT) · License: CC BY
Browse categories
Browse other part families
Jump to interior, exterior, accessories, dashboard, mechanical, or tools hubs when you need a different kind of replacement part.
Share whether this print actually fits a real car. Installed photos and material notes make the catalog more trustworthy.
Related Parts
Finding specific fitment/category matches first.

